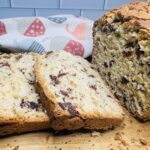
Date Nut Bread
This old-fashioned date nut bread comes straight from my 1950s General Foods Kitchens Cookbook, and it tastes just like the loaves Grandma used to wrap in foil every Christmas. It’s an easy quick bread made with sweet chopped dates, crunchy nuts, and a touch of brown sugar, so there’s no yeast, no kneading, and no waiting for dough to rise. Slice it up with a smear of cream cheese for holiday brunch, or bake two small loaves and give one away as a homemade gift!
Servings 12 Slices
Equipment
Ingredients
- 3 Cups Flour sifted
- 3 teaspoons Baking Powder
- ¼ teaspoon Baking Soda
- 1½ teaspoons Salt
- ½ Cup Sugar
- ¼ Cup Brown Sugar firmly packed
- 1 Egg well beaten
- 1¼ Cups Milk
- ¼ Cup Shortening
- ½ Walnuts finely chopped
- 1 Cup Dates finely cut
Instructions
- Preheat the oven to 350℉.
- Grease one 9"x5"x3 inch loaf pan or two 8"x4'x3" loaf pans and set aside.
- Measure the sifted flour and add the baking powder, baking soda, salt, and sugar. Sift again.
- Add the brown sugar and combine.
- Combine the egg and the milk.
- Add to the flour mixture, then add shortening. Mix only enough to dampen the flour.
- Fold in the walnuts and dates.
- Pour batter into the prepared loaf pan or pans.
- Bake at 350℉ for 1 hour and 5 minutes for one 9"x5"x3" pan or for 50 minutes for two 8"x4"x3" pans.
Notes
Helpful Tips
- Save time with pre-chopped dates. Most grocery stores sell dates already chopped, usually in the baking aisle near the raisins. If you’re cutting whole dates yourself, kitchen scissors work so much better than a knife, and a quick dip of the blades in flour every so often keeps them from sticking.
- Toss the dates and nuts in a little flour. Before folding them in, coat them with a spoonful of the flour mixture. This simple trick helps keep them from sinking to the bottom of the loaf.
- Toast your nuts first. This step isn’t in the original recipe, but a few minutes in a dry skillet brings out so much more flavor. Just let them cool before adding them to the batter.
- Don’t worry about a lumpy batter. The recipe says to mix only enough to dampen the flour, and that’s the secret to a tender loaf. If you keep stirring until it’s smooth, your bread will come out tough and dense.
- Grease that pan really well. The cookbook says “greased well” for a reason, since the sugar from the dates can make the bread stick. I like to add a strip of parchment paper too so I can lift the loaf right out.
- Check for doneness with a toothpick. Ovens back in the 1950s didn’t always run the same as ours, so start checking about 10 minutes early. The bread is done when a toothpick in the center comes out clean or with just a few moist crumbs.
- Cover with foil if it browns too fast. If the top is getting dark before the center is baked, lay a piece of foil loosely over the pan for the rest of the bake time.
- Let it cool completely before slicing. I know it’s tempting, but warm quick bread tends to crumble. Even better, wrap it up and slice it the next day, because the flavor gets richer as it sits.
- Bake two small loaves for gifting. Wrapped in plastic wrap and tied with a ribbon, a loaf of date nut bread makes a sweet homemade gift for neighbors, teachers, and friends during the holidays!