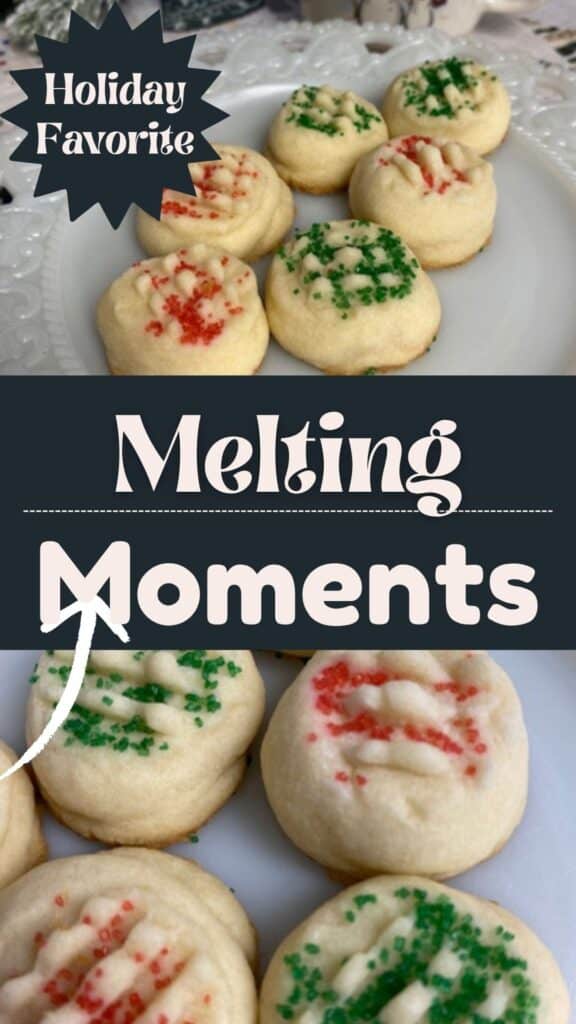
Easy Melting Moments Recipe
Some of the links in this post are affiliate links. This means if you click on the link and purchase the item, I will receive an affiliate commission at no extra cost to you. All opinions remain my own.
As an Amazon Associate I earn from qualifying purchases.
December is finally here, and that means all the holiday baking is happening in my house! Every year, I mix in old and new recipes. These Melting Moments cookies are a vintage recipe, but are new to me, and they will definitely be added to my yearly baking list!
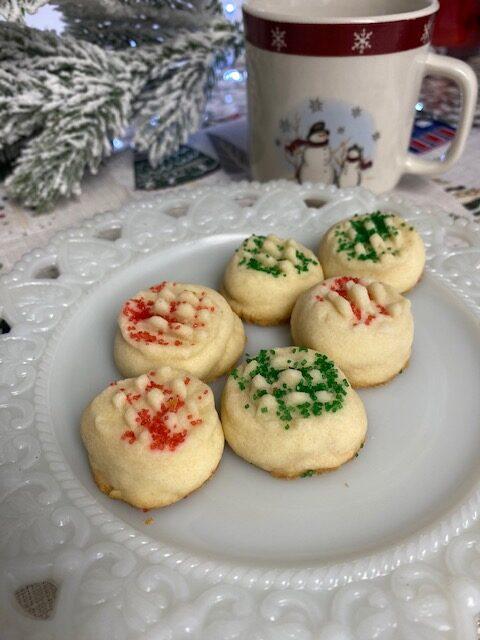
Melting Moments come from early-20th-century baking and are known for their soft, buttery texture that practically melts away with every bite. They’ve been passed around in old community cookbooks and handwritten recipe cards for generations. The first time I made them, they disappeared faster than anything else on my cookie tray, and now I can’t imagine December baking without them.
Quick Facts
- Prep Time: 15 minutes (plus 1 hour chill time)
- Bake Time: 8–10 minutes
- Total Time: About 1 hour 25 minutes
- Servings: About 2 dozen cookies
- Difficulty: Easy
- Texture: Light, tender, and delicate with a soft crumb
- Flavor: Buttery with a subtle almond sweetness
- Key Ingredients: Butter, powdered sugar, almond extract, flour
- Best For: Holiday cookie trays, gifting, and make-ahead baking
Why You’ll Love this Recipe
Melt-in-your-mouth texture: These cookies are soft, delicate, and practically disappear with every bite.
Simple pantry ingredients: Nothing fancy, just things you probably have already.
Make-ahead friendly: The dough chills well, making it easy to prep ahead during busy baking days.
Classic vintage charm: A timeless recipe that brings a little nostalgia to your cookie tray.
Quick bake time: Perfect when you want something homemade without spending all day in the kitchen.
Ingredients You Will Need
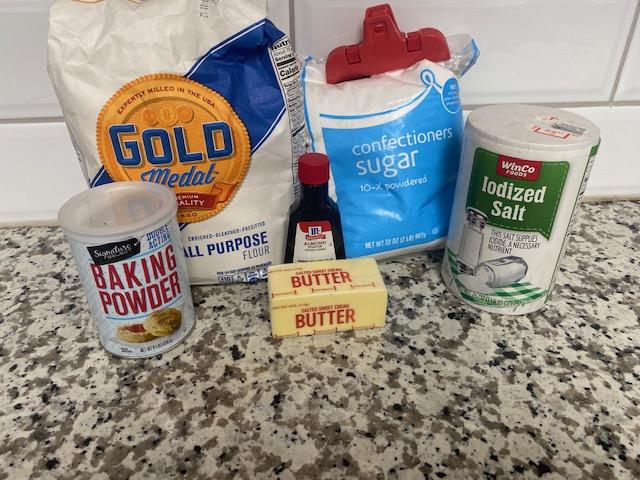
- Butter: The base of the cookies, giving them that rich flavor and tender, melt-away texture.
- Powdered Sugar: Sweetens the dough while keeping the texture soft and delicate instead of crisp.
- Almond Extract: Adds a light, classic flavor that makes these cookies taste a little extra special.
- Salt: Balances the sweetness and brings out the buttery flavor.
- Flour: Provides structure so the cookies hold their shape while still staying soft.
- Baking Powder: Gives a slight lift, helping create that light, airy texture instead of a dense cookie.
Helpful Tips
- Set butter out on the counter about an hour before starting the recipe. It will be much easier to cream that way. Softening in the microwave can be risky, as it often melts in the middle fairly quickly.
- Use a small cookie scoop or teaspoon to make sure the cookies are the right size.
- The cookies are very small, so if you make them larger than a teaspoon, they may take longer to bake and will make fewer.
- This recipe makes a small batch (about 2 dozen), so I would suggest doubling the recipe if you want to have any to share or add to cookie plates.
- Watch the edges, not the tops: The cookies should stay pale on top; look for lightly browned edges as your cue they’re done.
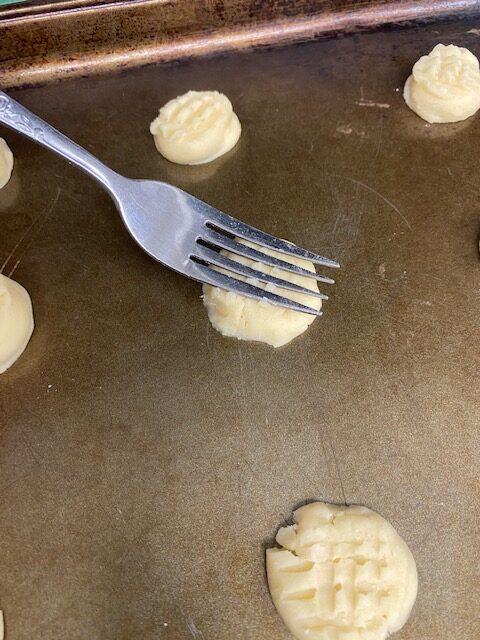
- Use a light touch when flattening: A gentle press with a fork is all you need; too much pressure can make them dense.
Substitutions and Variations
Swap the extract: Not a fan of almond? Use vanilla extract for a softer, more classic sugar cookie flavor, or try lemon extract for a light citrus twist.
Add a little crunch: Mix in finely chopped nuts like pecans or walnuts for a bit of texture.
Dress them up: Roll the dough balls in powdered sugar or colored sugar before baking for a simple decorative touch.
Sandwich style: Spread a little buttercream or jam between two cookies to turn them into delicate sandwich cookies.
Chocolate drizzle: Once cooled, drizzle melted chocolate over the tops for an easy upgrade.
Holiday twist: Add a tiny drop of food coloring to the dough or a hint of peppermint extract for a festive version.
Frequently Asked Questions
Why do my cookies spread too much? The dough may not have been chilled long enough, or the butter was too soft. Chilling helps them keep their shape.
Why are my cookies dry or crumbly? Too much flour or overbaking can cause this. Measure carefully and pull them out when the edges are just lightly golden.
Do I really need to chill the dough? Yes, it makes a big difference. Chilling helps control spreading and gives the cookies their soft, delicate texture.
Why do the tops stay pale? That’s exactly how they should be. These cookies are meant to stay light on top with just a hint of golden color around the edges.
Why are my cookies browning too much on the bottom? This can happen if the baking sheet is too dark or the oven runs hot. Try using parchment paper or adjusting your oven rack.
How do I know when they’re done? Look for lightly golden edges. The centers will still look pale and soft but will firm up as they cool.
Why are my cookies too dense? Overmixing or adding too much flour can weigh them down. Mix just until combined for the best texture.
Storage Tips
- Keep them airtight: Store the cookies in an airtight container to keep them soft and fresh.
- Layer carefully: Place parchment or wax paper between layers to prevent sticking or breaking.
- Room temperature is best: They’ll stay fresh on the counter for several days without drying out.
- Freeze for later: These freeze well—just place in a freezer-safe container and thaw at room temperature when needed.
- Avoid humidity: Keep them in a cool, dry spot so they don’t get sticky or lose their delicate texture.

What to Serve with Melting Moments
- Coffee or espresso: The buttery, delicate texture pairs perfectly with a warm cup of coffee.
- Hot tea: Think black tea, chai, or even a light herbal tea for a cozy combo.
- Hot chocolate: A rich mug of cocoa makes these feel extra special on a cold day.
- Milk: Classic and simple—especially great if you’re putting together a cookie tray.
- Fresh berries: Strawberries or raspberries add a bright, fresh contrast to the sweetness.
- Ice cream: Serve alongside vanilla or almond ice cream for an easy dessert plate.
- Whipped cream and fruit: A light, creamy side keeps things feeling a little fancy without much effort.
- Holiday cookie trays: These fit right in with other cookies for parties, gifting, or gatherings.
Other Recipes You May Enjoy
If you like Melting Moments, you might also like my Soft Sugar Cookies or my Old-Fashioned Fudge Nut Bars. These Almond Crescent Cookies are also delicious.
Melting Moments Cookies

Equipment
Ingredients
- ½ Cup Butter
- 5 Tablespoons Powdered Sugar
- 1 teaspoon Almond Extract
- ¼ teaspoon Salt
- 1 Cup Flour sifted
- 1 teaspoon Baking Powder
Instructions
- Cream together butter, powdered sugar, almond extract, and salt.
- When the mixture is light and fluffy, blend in flour and baking powder.
- Refrigerate mixture for one hour.
- Preheat oven to 350°.
- Form dough into teaspoon-sized balls.
- Place on ungreased cookie sheet.
- Flatten with fork.
- Bake at 350° for 8-10 minutes or until edges are browned.
- Cool completely before removing from cookie sheet.
Notes
- Set butter out on the counter about an hour before starting the recipe. It will be much easier to cream that way. Softening in the microwave can be risky, as it often melts in the middle fairly quickly.
- Use a small cookie scoop or teaspoon to make sure the cookies are the right size.
- The cookies are very small, so if you make them larger than a teaspoon, they may take longer to bake and will make fewer.
- This recipe makes a small batch (about 2 dozen), so I would suggest doubling the recipe if you want to have any to share or add to cookie plates.
- Watch the edges, not the tops: The cookies should stay pale on top; look for lightly browned edges as your cue they’re done.
- Use a light touch when flattening: A gentle press with a fork is all you need; too much pressure can make them dense.
*Adapted from The American-International Encyclopedic Cookbook by Anne London, copyright 1972
Amazon and the Amazon logo are trademarks of Amazon.com, Inc, or its affiliates.


I spent time with the kids and made these, they were fun to make and delicious to eat, thank you!
I’m so glad you enjoyed them!
My favorite Christmas cookie!
One of mine too!
I love cookies. This looks amazing. Thank you for sharing.
You’re welcome! I hope you get to try them! 🙂
These are so freaking good! Christmas go-to from now on.
That is great to hear! I’m glad you liked them! 🙂
Super tasty and easy! Just loved these. Thanks for sharing the recipe!
I’m so glad you enjoyed them! Happy to share! 🙂
Made these for the first time the other day. Very similar to spritz cookies without the extra work of the cookie press! I love spritz and I loved these, so did my family. Will make again.
I’m so happy to hear you liked them! I agree; they are similar and much easier. Happy holidays!
Im just woundering if I could use this receipe in my spritz gun?
Hi Michelle,
I have not tried it with a spritz gun, so I can’t say for sure. If you decide to try that and it works, let me know!
-Heidi 🙂
There is no egg?? Just wanted to clarify before trying them. They look good
Hi Becky,
That is correct, no egg. Thank you, I hope you enjoy them! Let me know how they turn out.
-Heidi
My grandmother had a similar recipe for candy cane (shaped) cookies. I’ll have to find it and share it with you. It was my favorite growing up. But shaping and twisting the dough is so tedious I have only tried to make them once. I’m excited to give this a try!
What a fun memory. That would be awesome! I hope you like these too. 🙂
These are sooo good.
Hi Donna,
Thank you so much! I’m glad you liked them. 🙂
Best,
Heidi (aka Lulu)