
Old-Fashioned Scalloped Corn (1960s Recipe)
Some of the links in this post are affiliate links. This means if you click on the link and purchase the item, I will receive an affiliate commission at no extra cost to you. All opinions remain my own.
As an Amazon Associate I earn from qualifying purchases.
Last Updated on October 27, 2026 by Heidi Bruaw
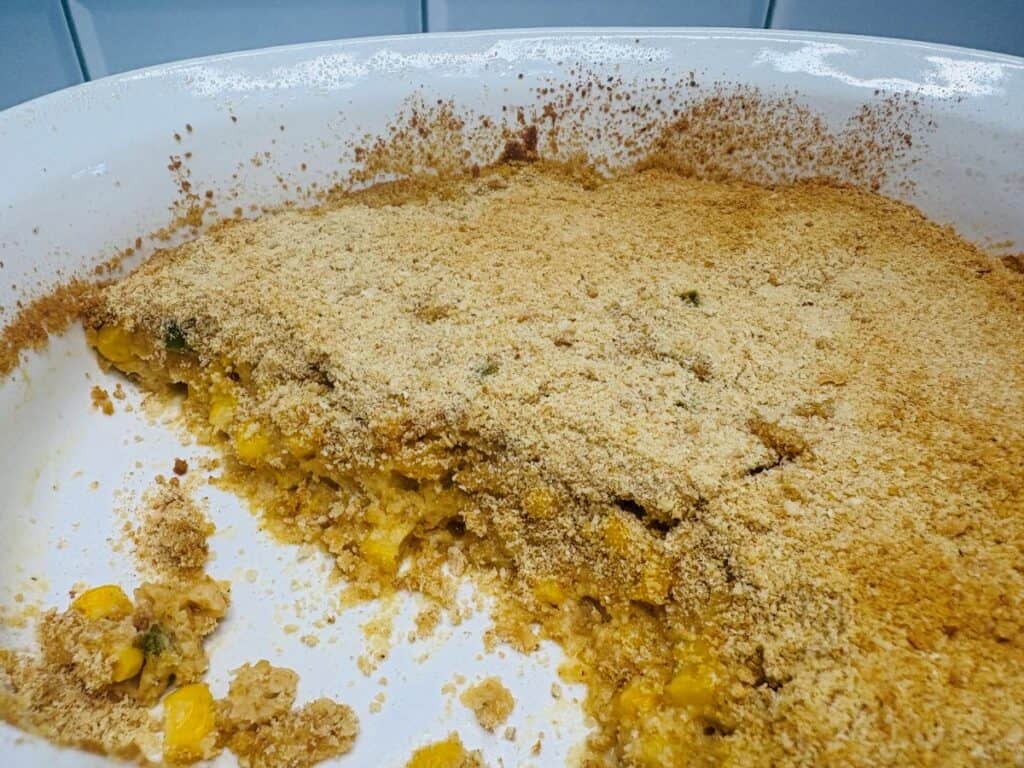
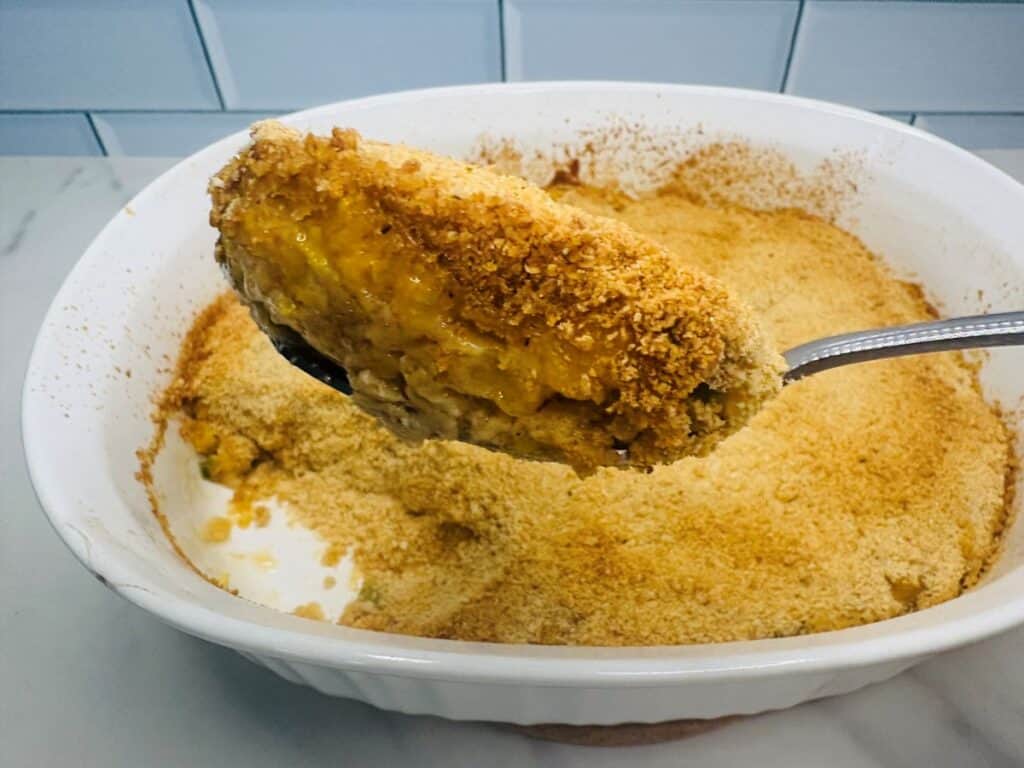
Scalloped corn is an old-fashioned baked side dish made with corn, a creamy seasoned sauce, and a buttery breadcrumb topping. The name goes back to the days when cooks baked creamy dishes in scallop shells, and scalloped corn has been in American cookbooks since the 1800s. By the 1960s, it was common on holiday tables, which is when Betty Crocker printed the version I’m sharing with you today.
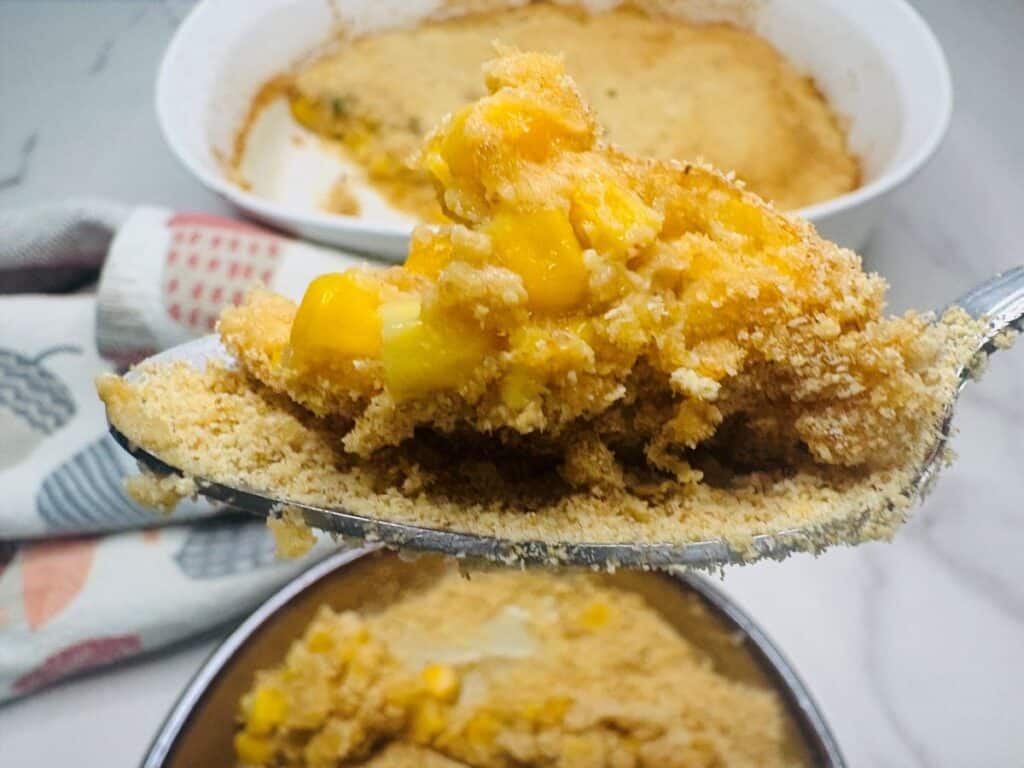
I found this recipe while looking through one of the 1960s Betty Crocker cookbooks in my collection, searching for an easy side to add to our Thanksgiving table this year. It uses simple pantry staples like canned corn, butter, milk, and an egg, plus a little green pepper, paprika, and ground mustard that give it way more flavor than you’d expect. It bakes in just 20 to 30 minutes in a 1-quart dish, so it’s perfect for a smaller holiday crowd or a Sunday dinner with the family!
Quick Facts
- What it is: A classic baked corn side dish with a creamy, seasoned sauce and a golden breadcrumb topping.
- Recipe source: A 1960s Betty Crocker cookbook from my collection.
- Prep time: 15 minutes
- Cook time: 20 to 30 minutes
- Total time: About 45 minutes
- Servings: 4 (it’s a smaller batch, which I love!)
- Oven temperature: 350°F
- Baking dish: 1 quart casserole dish
- Difficulty: Easy. If you can stir a sauce, you’ve got this.
- Key ingredients: Canned corn, butter, milk, an egg, onion, green pepper, paprika, ground mustard, and bread crumbs.
- Flavor: Sweet corn, a creamy custard-like texture, a little savory kick from the mustard and paprika, and a crunchy top.
- Best for: Thanksgiving, Christmas dinner, Easter ham, potlucks, and Sunday suppers.
- Make ahead tip: Mix it up a few hours early and keep it in the fridge. Add the bread crumbs right before it goes in the oven and give it a few extra minutes.
- Easy swaps: Use about 1 ¾ cups thawed frozen corn instead of canned, or try red pepper if green isn’t your thing.
- Doubling it: Double everything and bake in a 2-quart dish. Start checking at 30 minutes.
What Each Ingredient Does
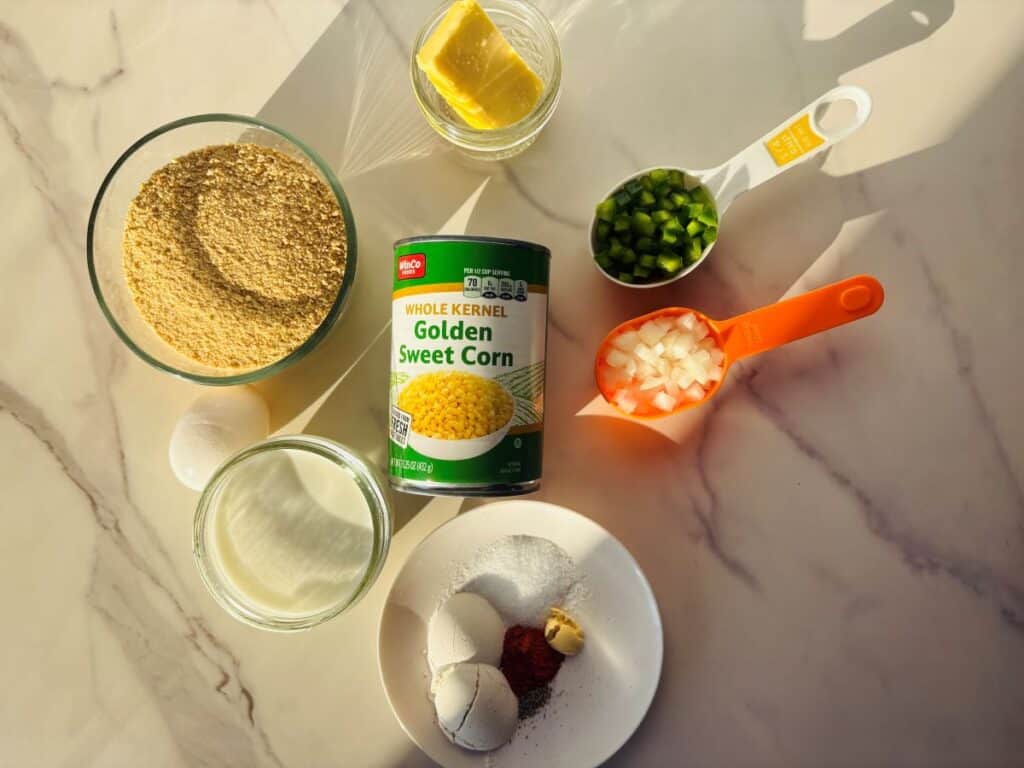
Every ingredient in this vintage recipe has a job, and knowing why it’s there makes it so much easier to swap things around or fix it on the fly. Here’s the breakdown!
- Onion (¼ cup, chopped): The onion builds the savory base. Sautéing it in butter until golden brings out its natural sweetness, so it blends right into the corn instead of tasting sharp.
- Green pepper (¼ cup, chopped): Onion and green pepper together were the combo in 1960s cooking. The pepper adds a little color and a fresh, slightly grassy flavor that keeps this from tasting one note.
- Butter (2 tablespoons): Butter sautés the veggies and then teams up with the flour to make a roux. That’s the old-fashioned way to thicken a sauce, and it adds a rich flavor you just can’t fake.
- Flour (2 tablespoons): Flour is what turns the milk into a creamy sauce. Cooking it in the butter until bubbly gets rid of any raw flour taste, so don’t skip that step.
- Salt (1 teaspoon): Salt makes the corn taste sweeter and brings all the other flavors forward. If you use salted butter or a salty canned corn, you can cut back a little.
- Paprika (½ teaspoon): Paprika gives the sauce a warm, pretty color and a mild, slightly sweet flavor. Regular paprika is what Betty Crocker meant here, but smoked paprika is a fun twist if you want to try it.
- Ground mustard (¼ teaspoon): This is the secret ingredient! It won’t make your corn taste like mustard. It just adds a little tang and depth that cuts through the richness, which is why so many vintage cheese and cream sauces call for it.
- Dash of pepper: A little black pepper adds a gentle bite to balance out the sweet corn.
- Milk (¾ cup): Milk is the base of the creamy sauce. Add it slowly while you stir so the sauce stays smooth and lump free. Whole milk gives you the richest result.
- Canned corn (15.25-ounce can): The star of the show! The original recipe doesn’t say whether to drain it, so here’s my take: draining gives you a firmer, more sliceable casserole, and leaving the liquid in makes it softer and saucier. Both are good, so go with what your family likes.
- Egg (1, slightly beaten): The egg is what makes scalloped corn set up in the oven. It binds everything together and gives the inside that soft, almost custard-like texture. Stir it in after you take the sauce off the heat so it doesn’t scramble.
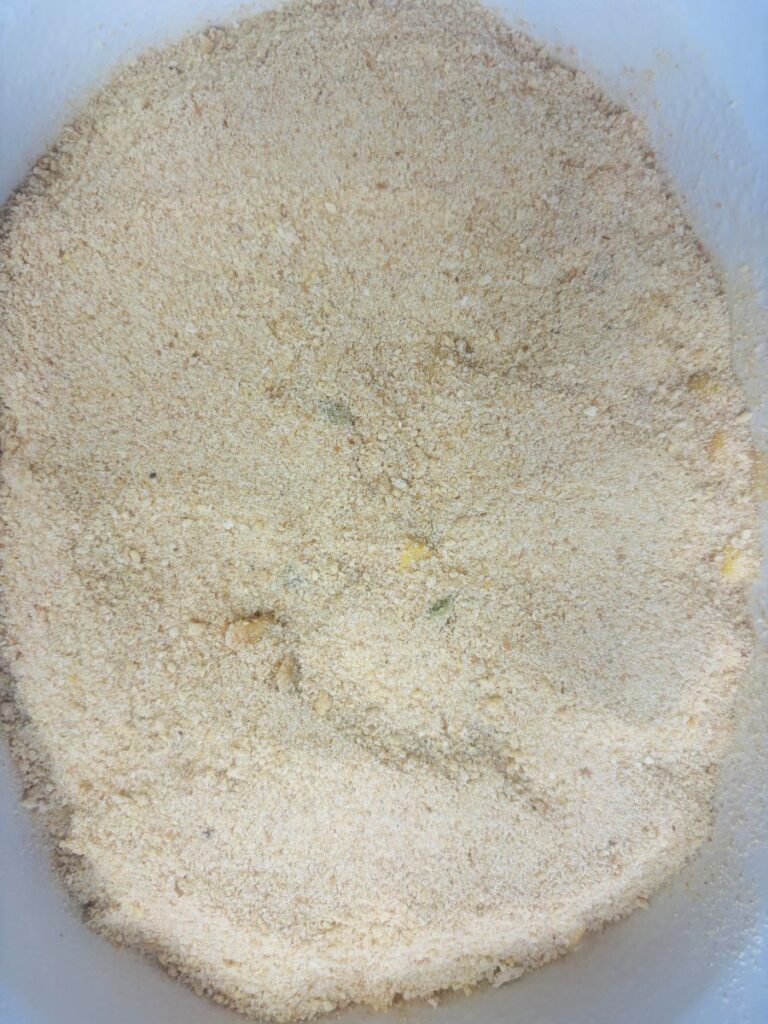
- Bread crumbs (½ cup): The bread crumbs are the crunchy, golden lid on top. Plain dry bread crumbs are classic, but crushed Ritz crackers or buttered panko are delicious too. For extra golden crumbs, toss them with a tablespoon of melted butter first!
Tips for Success
These little tricks make a big difference, especially if this is your first time making an old-fashioned scalloped corn recipe.
- Chop the onion and green pepper small. Tiny pieces cook faster and melt right into the sauce. Big chunks can stay crunchy, and nobody wants that in a creamy casserole.
- Take your time with the butter and flour. Let it bubble for a minute before you add the milk. That little bit of patience is what gives you a smooth sauce with no raw flour taste.
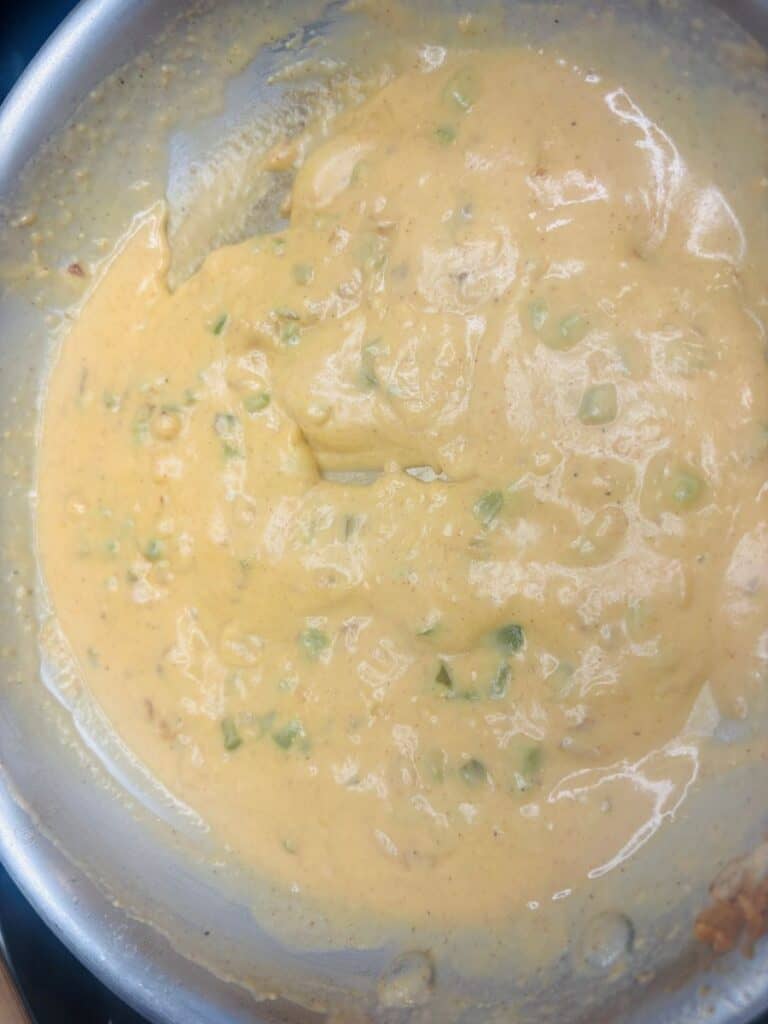
- Add the milk slowly and keep stirring. Pour in a little at a time and whisk as you go. This is the easiest way to avoid lumps, and once it starts boiling, keep stirring for the full minute so it doesn’t scorch on the bottom.
- Let the sauce cool for a minute before adding the egg. If the sauce is screaming hot, the egg can scramble. I like to stir in the corn first, which cools things down a bit, and then add the egg.
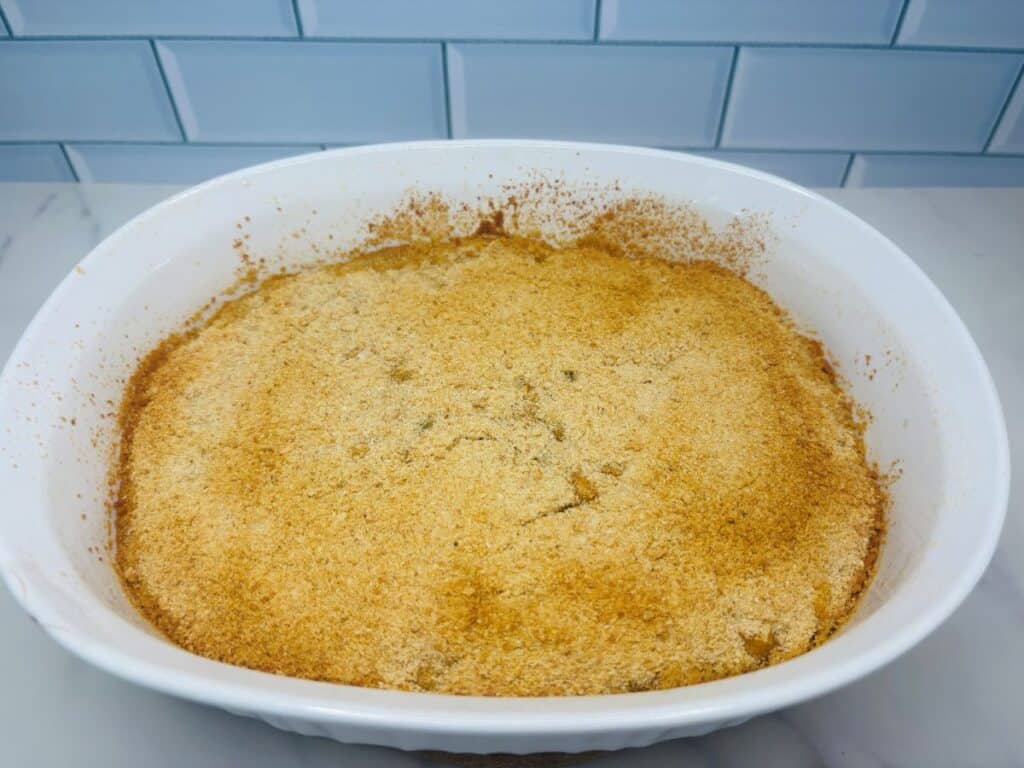
- Know when it’s done. Your scalloped corn is ready when the edges are bubbly, the top is golden, and the center no longer looks wet or jiggly. A knife poked near the middle should come out clean. If you have a thermometer, you’re looking for about 160°F in the center.
- Let it rest before serving. Give it 5 to 10 minutes on the counter. It finishes setting up as it cools, so every scoop holds together better.
- Plan around your Thanksgiving oven. Since this bakes at 350°F, it can share the oven with other sides. Or pop it in while the turkey rests and it’ll be hot and ready right when dinner hits the table!
- Want it cheesy? Stir in ½ cup of shredded cheddar with the corn or sprinkle some on top with the bread crumbs. It’s not in the original Betty Crocker recipe, but my family would never complain.
- Making a bigger batch? Double everything and use a 2-quart dish. It’ll need a little longer in the oven, so start checking at 30 minutes and keep going until the center is set.
Why You’ll Love Scalloped Corn
- It’s made with pantry staples. Canned corn, butter, milk, flour, and an egg. Chances are you already have almost everything you need sitting in your kitchen right now!
- No canned soup required. So many corn casserole recipes start with a can of cream soup or a box of muffin mix. This one makes its own creamy sauce from scratch, and you can taste the difference.
- It’s quick and easy. About 15 minutes of hands-on time and then the oven does the rest. That’s a big win when you’re juggling a turkey, three other sides, and a house full of people.
- It’s the perfect size. This recipe fits a 1-quart dish and serves about 4, which is great for a smaller holiday gathering or a regular weeknight dinner. Feeding a crowd? It doubles beautifully.
- Kids and picky eaters love it. It’s sweet, creamy, and topped with crunchy bread crumbs. What’s not to love?
- It goes with everything. Serve it with turkey at Thanksgiving, ham at Christmas or Easter, fried chicken on a Sunday, or pork chops on a random Tuesday. It just works.
- It’s easy to make your own. Add cheese, swap in red pepper, use smoked paprika, or top it with crushed Ritz crackers. This is a great recipe for playing around a little!
Substitutions and Variations
One of my favorite things about vintage recipes is how easy they are to play with. Here are the swaps that work best and a few fun twists to try!
Ingredient Substitutes
- Corn: No canned corn? Use about 1 ¾ cups of frozen corn (thawed and patted dry) or fresh corn cut right off the cob in summer. You can also swap half the corn for a can of cream-style corn if you want it extra creamy.
- Milk: Whole milk is best, but 2% works fine. For a richer casserole, use half-and-half or evaporated milk. If you need it dairy-free, go with an unsweetened, unflavored plant milk like oat or almond.
- Butter: Salted or unsalted both work. Just cut back on the salt a little if you use salted. Plant-based butter is a good dairy-free option.
- Flour: For gluten-free, use a 1-to-1 gluten-free flour blend. You can also use 1 tablespoon of cornstarch, but whisk it into the cold milk first instead of cooking it in the butter.
- Egg: I don’t recommend skipping it. The egg is what helps scalloped corn set, so without it you’ll end up with creamed corn instead of a casserole (still tasty, just different!).
- Green pepper: Red, orange, or yellow bell pepper adds a sweeter flavor and more color. A poblano or a little jalapeño gives it some gentle heat.
- Onion: Yellow, white, or sweet onion all work. In a pinch, use 1 tablespoon of dried minced onion.
- Bread crumbs: Swap in crushed Ritz crackers, buttered panko, crushed cornflakes, or gluten-free bread crumbs. Ritz crackers are my pick for a buttery, salty crunch!
Variations to Try
- Cheesy scalloped corn: Stir ½ cup shredded cheddar into the corn mixture and sprinkle more on top with the bread crumbs.
- Bacon scalloped corn: Add 4 slices of crispy, crumbled bacon. Bonus points for sautéing the onion and pepper in a little bacon grease!
- Smoky scalloped corn: Use smoked paprika instead of regular and add a pinch of chipotle powder.
- Jalapeño popper scalloped corn: Swap the green pepper for a diced jalapeño and add a little cream cheese and cheddar. This one is a hit for Game Day and tailgating!
- Street corn style: Top it with crumbled cotija cheese, chili powder, chopped cilantro, and a squeeze of lime right before serving.
- Herby scalloped corn: Stir in a tablespoon of fresh chives, parsley, or thyme for a fresh pop of flavor that’s perfect on a holiday table.
Storage Tips
Scalloped corn is easy to make ahead and keep on hand, which is a lifesaver during the busy holiday season. Here’s everything you need to know!
How long does scalloped corn last in the fridge? Cover it tightly with foil or move it to an airtight container, and it’ll keep in the fridge for 3 to 4 days. Just make sure it goes in the fridge within 2 hours of coming out of the oven.
Can you make scalloped corn ahead of time? Yes! Mix everything up, pour it into your greased baking dish, cover, and refrigerate for up to 24 hours. Wait to add the bread crumbs until right before baking, so they stay crunchy, and plan on an extra 5 to 10 minutes in the oven since it’s starting cold.
How do you reheat scalloped corn? The oven is the best way to keep that crispy top. Cover the dish with foil and warm it at 350°F for about 15 to 20 minutes, then uncover for the last few minutes to crisp the crumbs back up. For a single serving, the microwave works too. Heat it in 30-second bursts until it’s warmed through.
Can you freeze scalloped corn? You can, but I’ll be straight with you: it’s not my favorite way to store it. The egg and milk can get a little watery after thawing, and the bread crumbs lose their crunch. If you do freeze it, wrap it well and use it within 2 months. Thaw it overnight in the fridge, then reheat in the oven.
How do you keep scalloped corn warm for Thanksgiving dinner? Keep it covered in a 200°F oven for up to an hour, or scoop it into a slow cooker on the warm setting. If you’re taking it to a potluck, wrap the hot dish in foil and a couple of kitchen towels and it’ll stay warm for the drive!
Frequently Asked Questions
What is scalloped corn? Scalloped corn is a baked side dish made with corn, a creamy sauce, and a buttery breadcrumb topping. It’s soft and almost custard-like on the inside with a golden, crunchy top. It’s been a holiday table favorite in American homes for well over a century!
Why is it called scalloped corn? “Scalloped” is an old cooking term for baking something in a creamy sauce, usually with a crumb topping. The name goes back to when cooks baked these kinds of dishes in scallop shells. There’s no seafood involved, I promise!
What’s the difference between scalloped corn and corn pudding? Corn pudding usually has more eggs and cream, so it’s richer, softer, and more like a custard. Scalloped corn has a thicker, sauce-based filling and that signature breadcrumb topping. Think of scalloped corn as the slightly heartier cousin.
Is scalloped corn the same as Jiffy corn casserole? Nope! Jiffy corn casserole uses corn muffin mix and sour cream, so it bakes up more like a sweet, moist cornbread. Scalloped corn has no cornmeal or muffin mix and is creamy all the way through.
Do you drain the corn for scalloped corn? The original 1960s Betty Crocker recipe doesn’t say. Draining it gives you a firmer casserole that holds together better, and leaving the liquid in makes it softer and saucier. If you’re worried about it being runny, drain it.
Why is my scalloped corn runny? Usually it just needs more time in the oven. Bake it until the center is set, and a knife near the middle comes out clean. Undrained corn or not boiling the sauce for the full minute can also make it loose, and letting it rest 5 to 10 minutes after baking helps it firm up.
Can I bake scalloped corn in a different size dish? Yes. A 1-quart dish is perfect for this recipe as written. If you double it, use a 2-quart or 8×8 inch dish and add extra baking time. A wider, shallower dish will bake faster, so start checking a little early.
Is scalloped corn gluten free? Not as written, since it uses flour and bread crumbs. Swap in a gluten-free flour blend (or cornstarch) and gluten-free bread crumbs or crushed gluten-free crackers and you’re all set.
What do you serve with scalloped corn? It’s a classic with Thanksgiving turkey and Christmas or Easter ham. It’s also great with fried chicken, meatloaf, pork chops, or pot roast. Basically, if it’s comfort food, scalloped corn belongs next to it!
Can scalloped corn be a main dish? It’s really meant to be a side, but you can make it heartier by stirring in crumbled bacon, diced ham, or shredded chicken. Serve it with a green salad, and you’ve got an easy, cozy dinner.
What to Serve with Scalloped Corn
Scalloped corn is one of those sides that plays nice with just about everything. Here are my favorite ways to build a meal around it, whether it’s Thanksgiving dinner or a regular Tuesday night!
For Thanksgiving Dinner
- Roast turkey: The classic pairing. That creamy corn next to a slice of juicy turkey is pure holiday comfort.
- Bread Dressing or Homemade Cornbread Stuffing: Pick your team! Both are old-fashioned favorites that belong on the table with scalloped corn.
- Giblet Gravy: Grandma-style gravy for drizzling over everything on your plate.
- Candied Sweet Potatoes: Sweet, buttery, and a gorgeous pop of color next to the golden corn.
- Cranberry Orange Relish: A bright, tangy bite that cuts through all the rich sides.
- Mashed potatoes: Because it’s not Thanksgiving without them.
For Christmas and Easter
- Glazed ham: The salty, sweet ham and creamy corn are a match made in heaven.
- Bacon Wrapped Pork Loin: A showstopper main that’s easier than it looks.
- Green Beans Almondine with Bacon: Adds something green and crunchy to balance out the plate.
- Orange Glazed Carrots: Another easy side that looks so pretty on a holiday table.
For Sunday Suppers and Weeknights
- Slow Cooker Rump Roast: Set it in the morning, bake the corn at dinnertime, and you’re done!
- Swiss Steak: A true vintage dinner that tastes like it came straight out of a 1960s kitchen, just like this corn.
- Apple Butter Pork Chops: Sweet and savory pork chops that pair perfectly with creamy corn.
- Meatloaf: A retro comfort food combo that never gets old.
- Fried chicken: Crispy chicken and scalloped corn feel like Sunday dinner at Grandma’s house.
- Barbecue Chicken: Great for a potluck or a backyard get-together.
Rolls and Biscuits
- Grandma’s Parker House Rolls: Soft, buttery, and perfect for scooping up every last bite.
- Buttermilk Biscuits or Baking Powder Biscuits: Quick, flaky, and always a hit.
Save Room for Dessert
- Apple Pie or Pumpkin Chiffon Pie: The perfect way to finish a holiday meal. Need more ideas? Check out my roundup of Thanksgiving Pies!
Looking for even more ideas for your holiday table? Don’t miss my Thanksgiving Sides roundup.
Other Recipes You May Enjoy
If you like Scalloped Corn, you might also like my Corn Pudding or Slow Cooker Creamed Corn. This Garlic Butter Fried Corn is also delicious.
Scalloped Corn

Equipment
Ingredients
- ¼ Cup Onion chopped
- ¼ Cup Green Pepper chopped
- 2 Tablespoons Butter
- 2 Tablespoons Flour
- 1 teaspoon Salt
- ½ teaspoon Paprika
- ¼ teaspoon Ground Mustard
- Dash Pepper
- ¾ Cup Milk
- 1 Can Whole Kernel Corn 15.25 ounce can
- 1 Egg slightly beaten
- ½ Cup Breadcrumbs
Instructions
- Preheat oven to 350℉.
- Grease 1-quart baking dish and set aside.
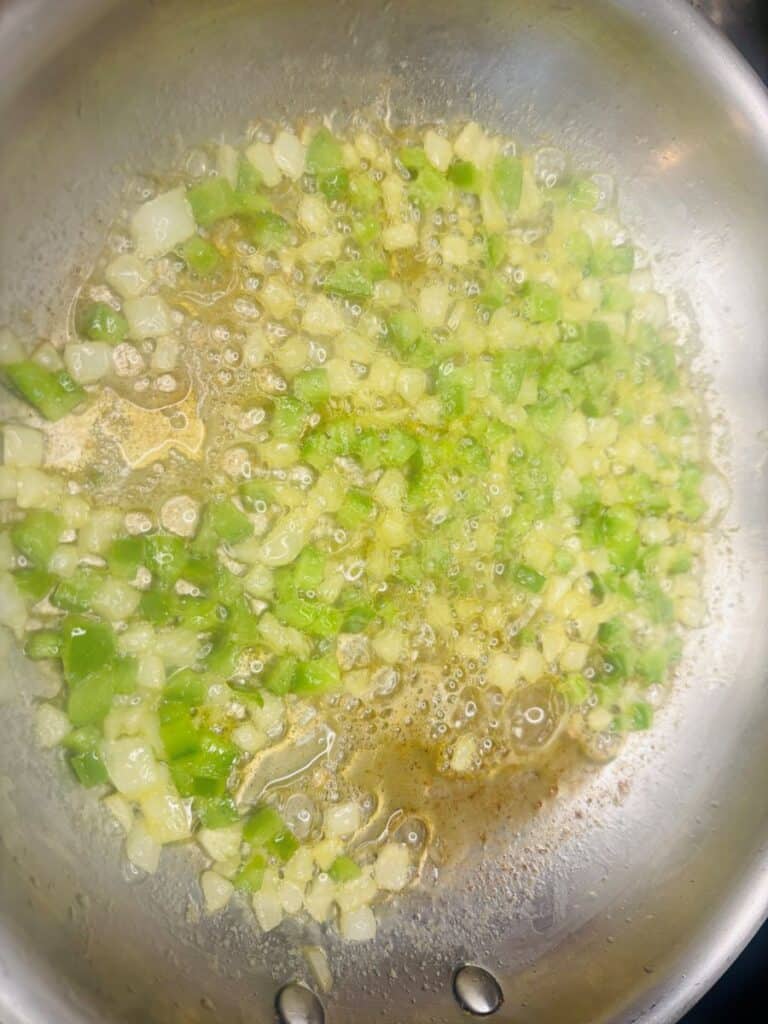
- Saute onion and green pepper in butter until golden.
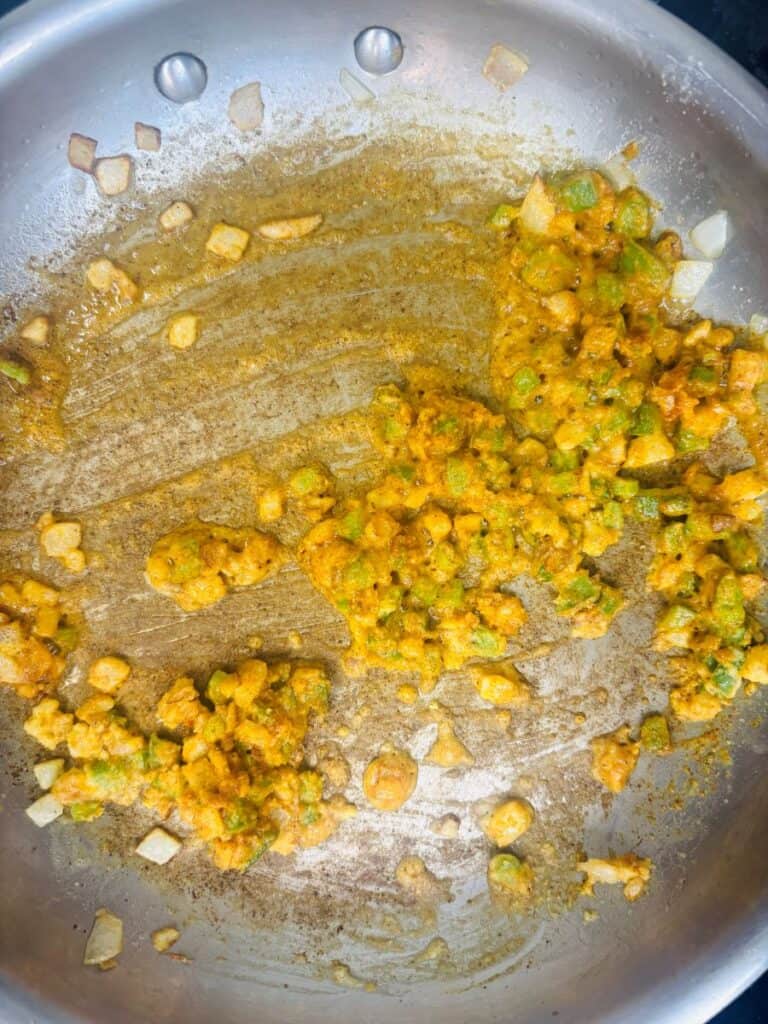
- Stir in the flour, salt, paprika, ground mustard, and pepper. Cook until bubbly.
- Gradually add the milk and bring to a boil. Let boil for 1 minute, stirring constantly.
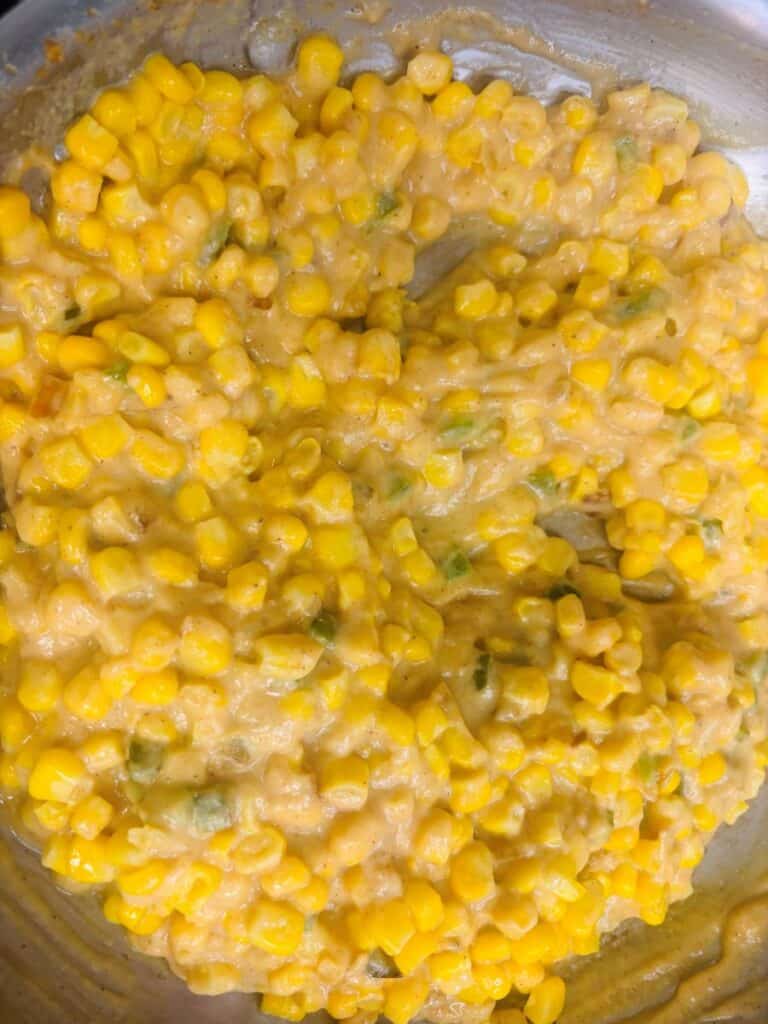
- Remove from the heat. Add the corn and the slightly beaten egg. Stir to combine.
- Pour into 1-quart baking dish.
- Top with breadcrumbs.
- Bake at 350℉ for 20-30 minutes.
Notes
- Chop the onion and green pepper small. Tiny pieces cook faster and melt right into the sauce. Big chunks can stay crunchy, and nobody wants that in a creamy casserole.
- Take your time with the butter and flour. Let it bubble for a minute before you add the milk. That little bit of patience is what gives you a smooth sauce with no raw flour taste.
- Add the milk slowly and keep stirring. Pour in a little at a time and whisk as you go. This is the easiest way to avoid lumps, and once it starts boiling, keep stirring for the full minute so it doesn’t scorch on the bottom.
- Let the sauce cool for a minute before adding the egg. If the sauce is screaming hot, the egg can scramble. I like to stir in the corn first, which cools things down a bit, and then add the egg.
- Know when it’s done. Your scalloped corn is ready when the edges are bubbly, the top is golden, and the center no longer looks wet or jiggly. A knife poked near the middle should come out clean. If you have a thermometer, you’re looking for about 160°F in the center.
- Let it rest before serving. Give it 5 to 10 minutes on the counter. It finishes setting up as it cools, so every scoop holds together better.
- Plan around your Thanksgiving oven. Since this bakes at 350°F, it can share the oven with other sides. Or pop it in while the turkey rests and it’ll be hot and ready right when dinner hits the table!
- Want it cheesy? Stir in ½ cup of shredded cheddar with the corn or sprinkle some on top with the bread crumbs. It’s not in the original Betty Crocker recipe, but my family would never complain.
- Making a bigger batch? Double everything and use a 2-quart dish. It’ll need a little longer in the oven, so start checking at 30 minutes and keep going until the center is set.
Amazon and the Amazon logo are trademarks of Amazon.com, Inc, or its affiliates.


