
Old-Fashioned Chocolate Waffles Recipe
Some of the links in this post are affiliate links. This means if you click on the link and purchase the item, I will receive an affiliate commission at no extra cost to you. All opinions remain my own.
As an Amazon Associate I earn from qualifying purchases.
Last Updated on May 15, 2026 by Heidi Bruaw
There’s something special about pulling a recipe straight from a well-loved cookbook, especially one that’s been around since the 1940s. These chocolate waffles come from my grandma’s collection, and I like to imagine her making them in her busy kitchen decades ago, filling the kitchen with that rich cocoa smell. Chocolate waffles have been around since early 20th-century American kitchens, when home cooks started adding cocoa and melted chocolate to classic batters for a simple but indulgent twist.
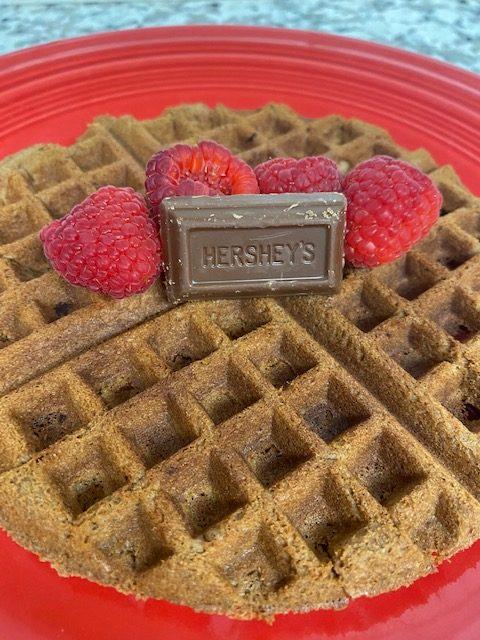
I love recipes like this because they feel like a little piece of family history you can actually taste. This one is simple, cozy, and just a bit nostalgic, with a soft, chocolatey inside and those perfectly crisp edges from the waffle iron. Whether you top them with whipped cream or keep it classic with butter and syrup, they’re the kind of breakfast that your family will ask for again.
Quick Facts
- Recipe Source: Grandma’s 1940s cookbook
- Flavor: Rich chocolate with a lightly sweet, classic waffle base
- Texture: Crisp edges with a soft, tender inside
- Skill Level: Easy and beginner-friendly
- Prep Time: About 15 minutes
- Cook Time: 3–5 minutes per waffle (depending on your waffle iron)
- Key Step: Folding in whipped egg whites keeps the waffles light
- Perfect For: Weekend breakfasts, brunch, or a cozy treat anytime
Why You’ll Love this Recipe
It has that rich, homemade chocolate flavor you just don’t get from a shortcut version
The extra steps give you a better texture with a lighter, more delicate crumb
It feels like a true from-scratch recipe, the kind you make when you want something a little special
Perfect for slower mornings when you can take your time in the kitchen
A great way to bring a bit of family tradition into your day
Easy to make them fancy with toppings or keep simple, depending on your mood

Ingredients You Will Need
- Shortening: Gives the waffles richness and helps create those crisp edges while keeping the inside tender.
- Sugar: Adds sweetness and also helps with browning, giving the waffles a nice golden exterior.
- Eggs (separated): The yolks add richness and help bind everything together, while the whipped egg whites are folded in to make the waffles lighter and a little fluffier.
- Unsweetened Baking Chocolate: Brings that deep, classic chocolate flavor without extra sweetness, so the waffles don’t taste overly sugary.
- Salt: Balances the sweetness and enhances the chocolate flavor so it doesn’t fall flat.
- Flour: Provides the structure and body of the waffles, holding everything together.
- Baking Powder: Helps the waffles rise and become soft instead of dense.
- Milk: Adds moisture and helps create a smooth batter that cooks up tender.
- Vanilla: Rounds out the flavor and adds a subtle warmth that pairs really well with the chocolate.
Helpful Tips
- Take your time with the egg whites. Beating them to stiff peaks and gently folding them in makes a big difference in texture. It’s what keeps the waffles from feeling too dense.
- Melt the chocolate slowly. Use low heat or a double boiler so it stays smooth and doesn’t scorch. Let it cool slightly before mixing it in so it doesn’t affect the eggs.
Don’t rush the batter. Add the dry ingredients and milk in stages like the recipe says. It helps everything blend smoothly without overmixing. - Preheat your waffle iron well. A fully heated iron gives you better browning and those crisp edges right from the start.
- Grease the waffle iron lightly. Even if it’s nonstick, a little grease helps prevent sticking and gives a nicer finish.
- Avoid overmixing. Once everything is combined, stop mixing. Overworking the batter can make the waffles tougher.
- Keep waffles warm in the oven. Place finished waffles on a baking sheet in a low oven (around 200°F) so you can serve them all at once.
- Serve right away for the best texture. These are at their best fresh off the iron when the edges are crisp, and the inside is soft.

Substitutions and Variations
Chocolate Chips: Add chocolate chips or chunks to the batter for extra chocolatey goodness. You can use dark chocolate, semi-sweet chocolate, or white chocolate chips.
Spices: Enhance the flavor profile by adding a pinch of ground cinnamon or a dash of espresso powder for a subtle depth of flavor.
Extracts: Try different extracts like vanilla, almond, or mint extract to infuse unique flavors into the waffles.
Nut Butter: Incorporate nut butter, such as almond or peanut butter, for a nutty twist and added protein.
Mix-Ins: Include mix-ins like shredded coconut, mini marshmallows, or chopped dried fruits for added texture and flavor.
Frequently Asked Questions
How can I prevent the waffles from sticking to the waffle iron? To prevent sticking, make sure to generously grease the waffle iron with cooking spray or melted butter before pouring the batter. Additionally, ensure that the waffles are fully cooked and crisp before opening the waffle iron.
Why are my waffles turning out too dense? This recipe has a few steps that really matter, especially handling the egg whites carefully. If they’re overmixed or not fully whipped, the waffles won’t have that lighter texture.
Can I make the batter ahead of time? It’s best to make this batter fresh. Since it relies on whipped egg whites, letting it sit too long will cause it to lose that airy quality.
What kind of waffle iron works best? Any standard waffle iron will work, but deeper irons tend to give a softer inside with crisp edges, which works really nicely with this batter.
Do I have to separate the eggs? Technically, you could skip it, but you’ll lose some of the lighter texture. It’s one of the steps that makes this recipe feel a little more special.
Storage Tips
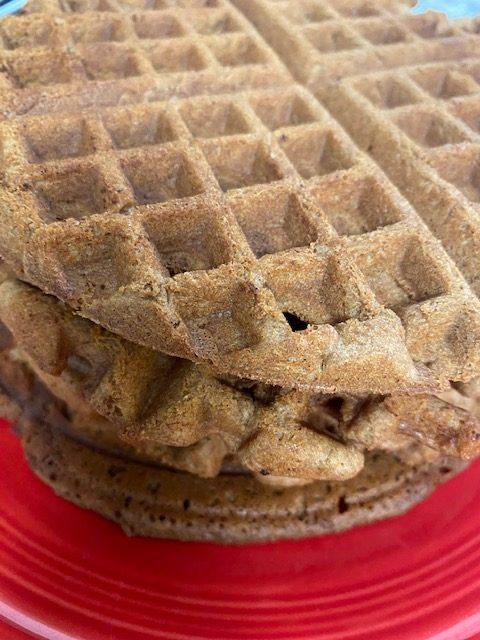
- Let them cool completely first. Storing warm waffles can trap moisture and make them soggy, so give them time to cool on a rack.
- Refrigerate for short-term storage. Place waffles in an airtight container or zip-top bag and refrigerate for up to 3 days.
- Freeze for longer storage. Lay waffles in a single layer to freeze first, then transfer to a freezer-safe bag. This keeps them from sticking together.
- Use parchment between layers. If stacking, add parchment paper between waffles to keep them from sticking and make it easier to grab just one or two.
- Reheat the right way. Skip the microwave if you can; it makes them soft. Use a toaster or oven to bring back those crisp edges.
- Label and date. If freezing, label the bag so you remember when you made them. They’re best used within 2 months for the best flavor and texture.
What to Serve with Chocolate Waffles
Fresh berries or sliced fruit: Strawberries, raspberries, or bananas add a fresh, slightly tart contrast to the rich chocolate.
Whipped cream or powdered sugar: A simple, classic topping that keeps things light and lets the waffles shine.
Maple syrup: Go traditional with maple syrup on top.
Crispy bacon or breakfast sausage: That sweet-and-savory combo works so well here and balances out the richness.
Vanilla yogurt or Greek yogurt: Adds a creamy, slightly tangy element that pairs nicely with the chocolate flavor.
Nut butter or hazelnut spread: Peanut butter or a chocolate-hazelnut spread makes it feel extra indulgent.
Hot coffee or cold milk: A warm cup of coffee or a glass of milk rounds everything out and makes it feel like a complete treat.
Other Recipes You May Enjoy
You might also like my Classic French Toast or my Bran Muffins. French Toast Roll-Ups and Gluten Free Protein Pancakes are also delicious options.
Old-Fashioned Chocolate Waffles

Equipment
Ingredients
- ½ Cup Shortening
- 1 Cup Sugar
- 2 Eggs Separated
- 2 Ounces Unsweetend Baking Chocolate Bar
- ¼ Teaspoon Salt
- 1½ Cups Cake Flour
- ½ Teaspoon Vanilla
- 2 Teaspoons Baking Powder
- ½ Cup Milk
Instructions
- Cream shortening and sugar.
- Separate eggs. Set egg whites aside.
- Beat egg yolks. Add to creamed mixture.
- Melt chocolate over double boiler, then add to creamed mixture.
- Mix thoroughly.
- Sift flour (I use a whisk) with baking powder and salt.
- Add alternately with milk to chocolate mixture.
- Add vanilla and mix completely.
- Beat egg whites until stiff peaks form then fold into mixture.
- Bake in hot waffle iron.
- Add toppings of your choice.
Notes
- Take your time with the egg whites. Beating them to stiff peaks and gently folding them in makes a big difference in texture. It’s what keeps the waffles from feeling too dense.
- Melt the chocolate slowly. Use low heat or a double boiler so it stays smooth and doesn’t scorch. Let it cool slightly before mixing it in so it doesn’t affect the eggs.
Don’t rush the batter. Add the dry ingredients and milk in stages like the recipe says. It helps everything blend smoothly without overmixing. - Preheat your waffle iron well. A fully heated iron gives you better browning and those crisp edges right from the start.
- Grease the waffle iron lightly. Even if it’s nonstick, a little grease helps prevent sticking and gives a nicer finish.
- Avoid overmixing. Once everything is combined, stop mixing. Overworking the batter can make the waffles tougher.
- Keep waffles warm in the oven. Place finished waffles on a baking sheet in a low oven (around 200°F) so you can serve them all at once.
- Serve right away for the best texture. These are at their best fresh off the iron when the edges are crisp, and the inside is soft.
Amazon and the Amazon logo are trademarks of Amazon.com, Inc, or its affiliates.



Sounds delicious,
Thank you!
I have never tried chocolate waffles but it sounds delicious.
Thank you! I hadn’t either before I made these. 🙂
Oh my gosh this reminds me of a recipe my grandma made us when we were kids. Chocolate for breakfast is wonderful!
How fun! Yes, it really is!
These sound delicious! I love breakfast and I love waffles so I’ll definitely have to give these a try!
You will love them! 🙂
I’ve never tried chocolate waffles for breakfast as I’m not really a fan of waffles in general but your post makes me want to try it out. Looks so yummy!!
Thank you! They are really tasty!
Ohhh these look amazing! I love having sweets and cakes for a wee breakfast treat!
Thank you! I love having dessert for breakfast, lol. 🙂
Just reading about these and looking at them, I can smell how delicious they are, haha! Thanks for the recipe — this is going to be made this weekend! Yum!
Thank you, they are delicious! I hope you enjoy them!
This sounds delicious. I love waffles with chocolate as a treat every now and again but have never tried to make my own before.
Thank you! They are fun to make and very yummy. 🙂
Chocolate waffles seems like a delicious recipe. I’ll definitely love to try this out. Thanks for sharing.
Thank you! 🙂
“Is this recipe simple and quick? No. Is it delicious? Yes!” I love this! I think sometimes we need to remember it’s not all about fast fixes. Taking time over things is part of the pleasure of cooking really good food. Bookmarking this recipe for a future treat, thank you 🙂
Thank you! Yes, I think in today’s world we often forget that. Things that take time often taste better than quick and easy meals. Let me know how you like them when you make them. 🙂
Yum! Chocolate waffles sound fab! I love breakfast too! Pinning this for later x
http://www.lynnmumbingmejia.com
Chocolate waffles are definitely a yummy treat! 🙂
Oh my goodness these waffles look absolutely delcious! Thanks for sharing this recipe, I will have to try them out!
Thank you! They are super tasty! I hope you like them. 🙂
I absolutely love waffles but I don’t have the machine. I should buy it anytime soon and will keep your recipe in mind.
Waffles are so yummy! I wonder if this could be made as a pancake? I’m not sure. I might have to try it!
Ok these look delicious! Can’t remember the last time I had a waffle!
Katie | katieemmabeauty.com
Thank you! Waffles are a rare treat around here. We mostly have pancakes or eggs when we make breakfast. 🙂
I love breakfast! We sometimes do breakfast for dinner so this is a delicious recipe to try and add to our choices! thank you so much for sharing x
This would be yummy for dinner or as a special dessert after breakfast for dinner! 🙂
I haven’t tried chocolate waffles before but this sounds so fab. I’ll have to pin this for later. Thank you x!
Thank you! I hope you like it!
Oh these look delicious! I will need to give them a try!
Thank you! Let me know what you think. 🙂
Iv never made chocolate waffles before but wow this recipe is amazing…. in fact it was my first time making waffles in general! Thanks so much
I’m glad you liked it! 🙂
This sounds sooooo good!! I’ll have to try ❤️
Thank you! They are sweet and delicious!
These look so good, I rarely have waffles but the thought of chocolate waffles sounds wonderful. Great post!
Thank you, they are delicious! 🙂