Old-Fashioned Date Nut Bread Recipe (From a 1950s General Foods Cookbook)
Some of the links in this post are affiliate links. This means if you click on the link and purchase the item, I will receive an affiliate commission at no extra cost to you. All opinions remain my own.
As an Amazon Associate I earn from qualifying purchases.
Last Updated on November 7, 2026 by Heidi Bruaw
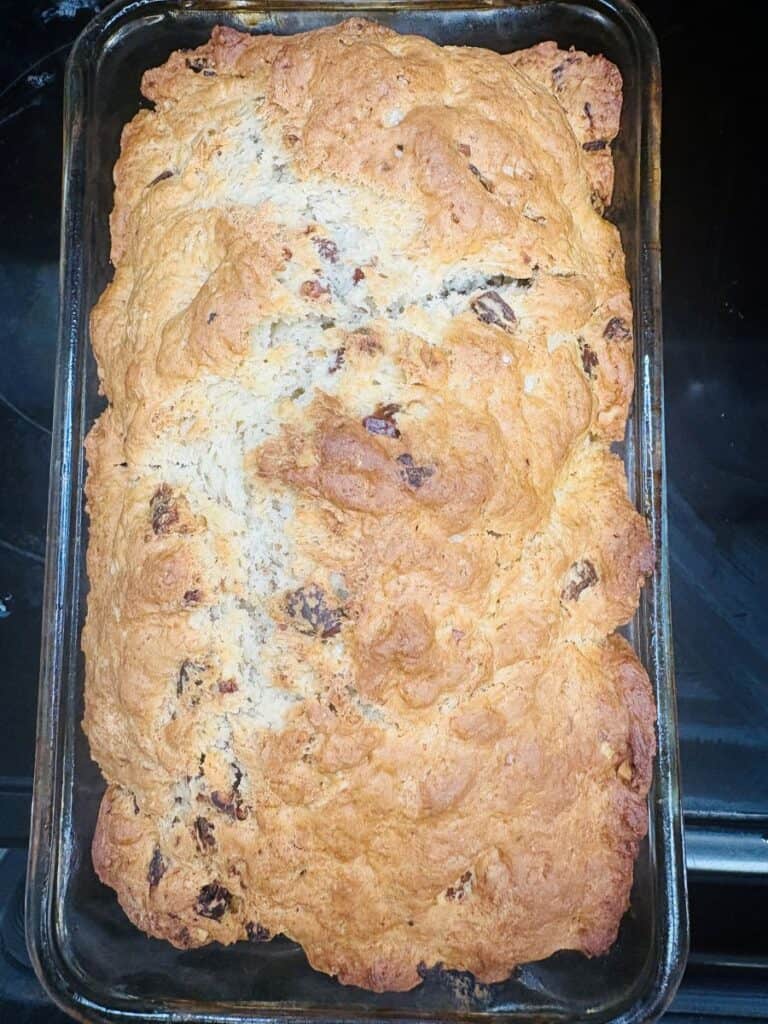
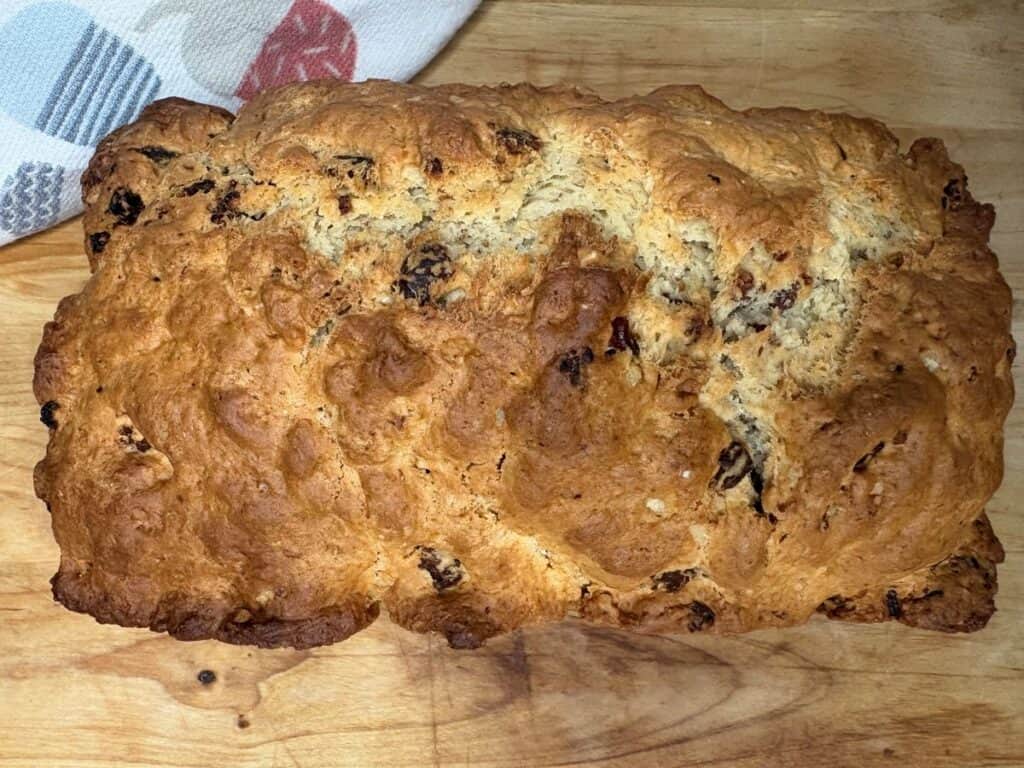
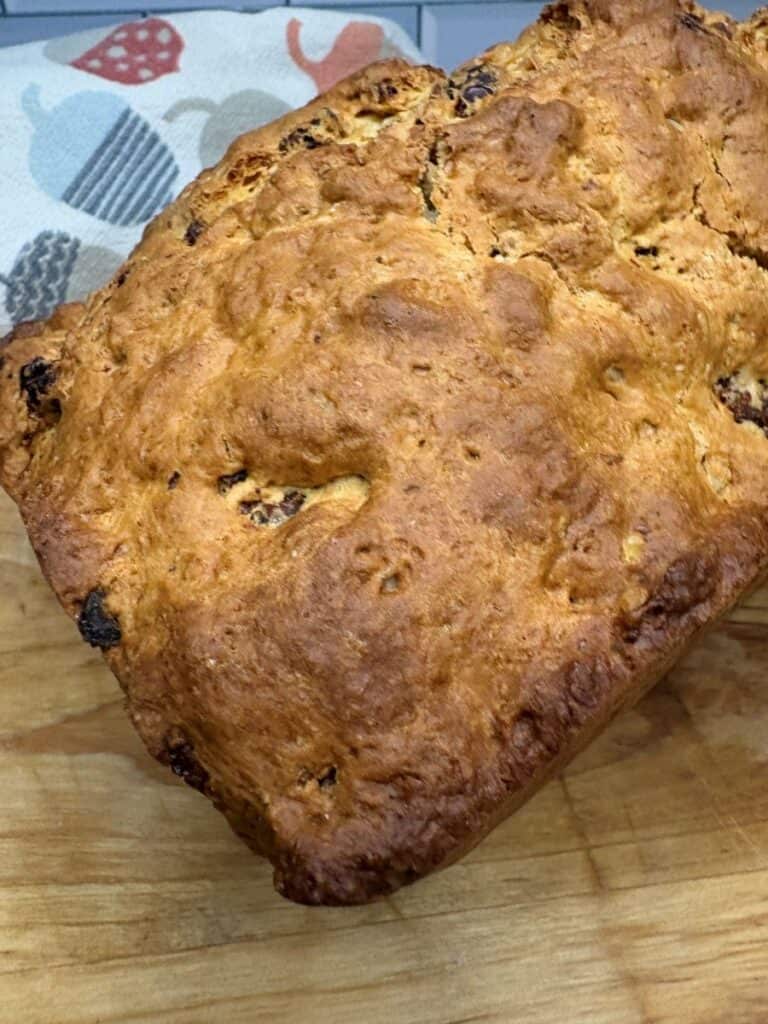
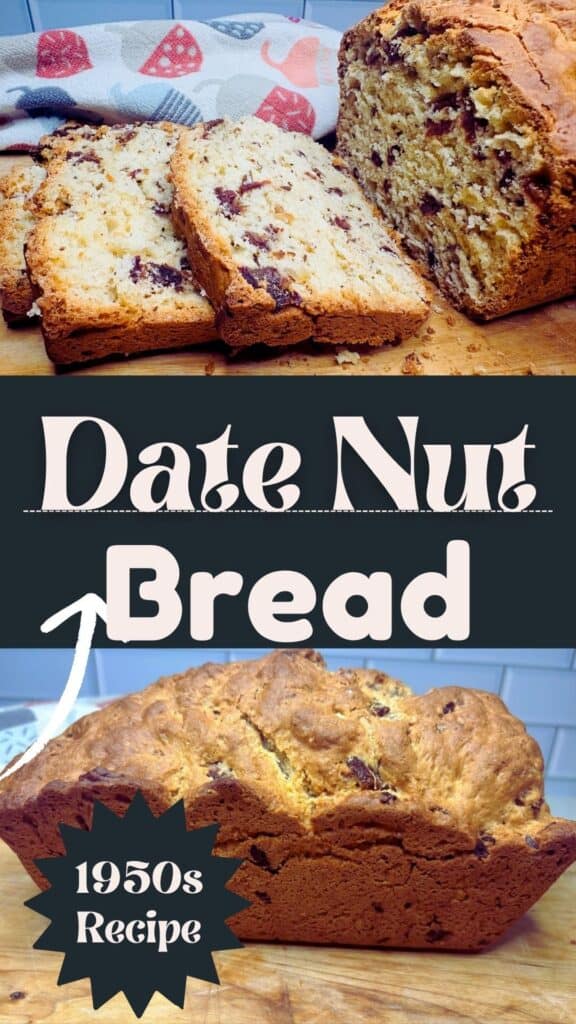
Have you ever noticed that date nut bread is one of those recipes nobody seems to make anymore, but everybody remembers? It seemed like every mom, grandma, and neighbor had a loaf wrapped in foil on the counter during the holidays. So when I was flipping through my 1950s General Foods Kitchens Cookbook and spotted this old-fashioned date nut bread recipe, I knew I had to give it a try.
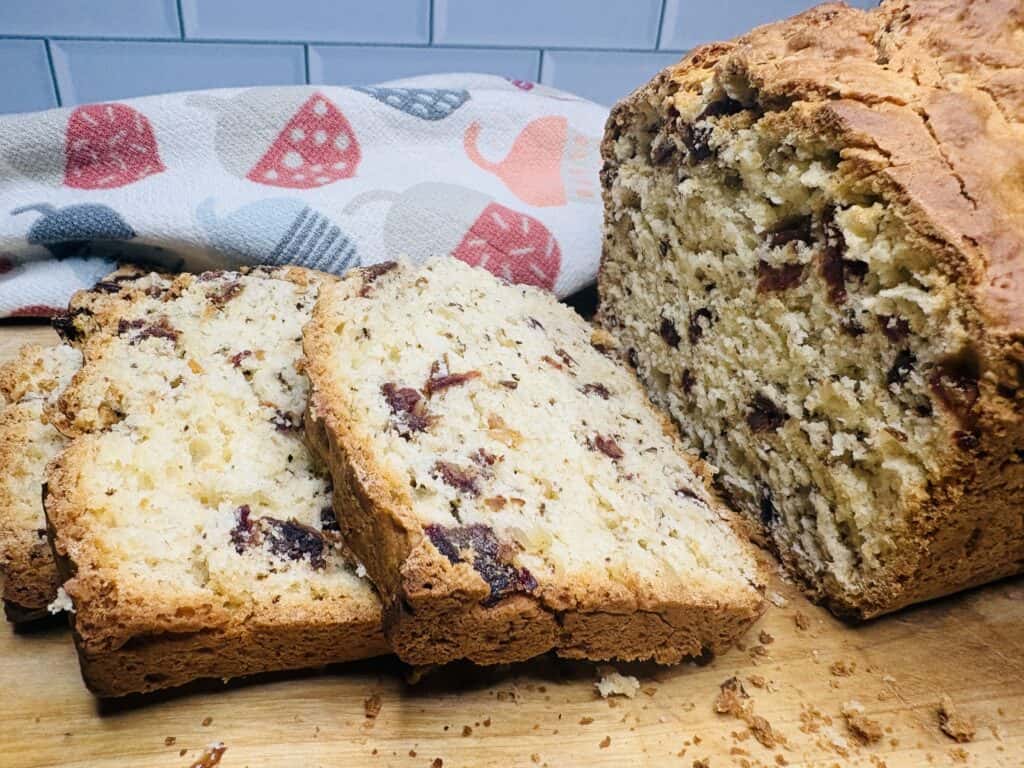
This is a classic quick bread, which means no yeast, no kneading, and no waiting around for dough to rise. You just stir it until the flour is barely damp, fold in chopped dates and nuts, and let the oven do the rest. The recipe makes one big loaf or two smaller ones, and that second loaf is just right for wrapping up as a holiday gift!
Quick Facts
- Recipe source: General Foods Kitchens Cookbook (1950s)
- Type of bread: Quick bread (no yeast, no kneading, no rise time)
- Prep time: About 20 minutes
- Bake time: 1 hour 5 minutes for one 9x5x3-inch loaf, or 50 minutes for two 8x4x3-inch loaves
- Oven temperature: 350°F
- Yield: 1 large loaf (about 12 slices) or 2 smaller loaves
- Skill level: Easy, great for beginner bakers
- Key ingredients: Chopped dates, chopped nuts, brown sugar, and milk
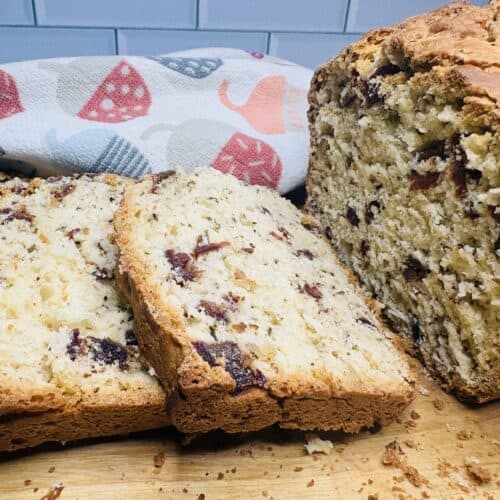
- Flavor and texture: Lightly sweet with a caramel-like richness from the dates and a tender, moist crumb
- Best served: Sliced and spread with butter or cream cheese, alongside coffee or tea
- Perfect for: Holiday gift-giving, Christmas morning, Thanksgiving brunch, and cookie exchanges
- Make ahead: Wrap tightly and store at room temperature for up to 3 days, or freeze for up to 3 months
- Baking tip: Mix only until the flour is dampened. Overmixing makes quick bread tough and dense.
What Each Ingredient Does
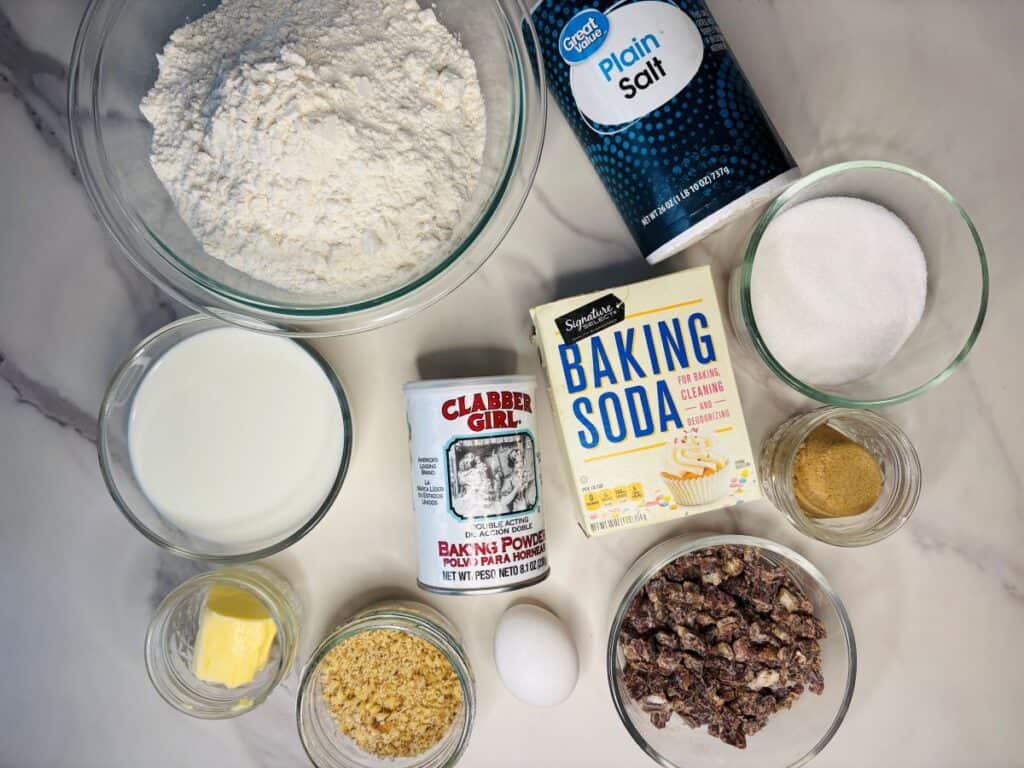
- Sifted flour (3 cups): Flour gives the bread its structure. Vintage recipes almost always call for sifted flour, which is lighter than flour scooped straight from the bag, so be sure to sift before you measure or the bread can turn out dry and heavy.
- Baking powder (3 teaspoons): This is the main leavening and what makes it a “quick” bread. It creates the bubbles that help the loaf rise in the oven without any yeast.
- Baking soda (1/4 teaspoon): Baking soda gives the batter an extra lift and helps the loaf brown nicely. It also reacts with the slightly acidic brown sugar and dates to keep the flavor balanced.
- Salt (1 1/2 teaspoons): Salt brings out the sweetness of the dates and keeps the bread from tasting flat.
- Granulated sugar (1/2 cup): White sugar sweetens the bread and helps keep the crumb soft and tender.
- Brown sugar (1/4 cup, packed): Brown sugar adds a deeper, caramel-like flavor that pairs perfectly with dates. The molasses in it also adds moisture.
- Egg (1, well beaten): The egg binds everything together and adds richness. Beating it well before mixing helps it blend evenly into the batter.
- Milk (1 1/4 cups): Milk moistens the dry ingredients and activates the baking powder. It also gives the bread a softer, more tender texture than water would.
- Shortening (1/4 cup, melted): Shortening was a pantry staple in 1950s kitchens. It keeps the bread moist and tender, and melted butter or vegetable oil works as a swap if you don’t keep shortening on hand.
- Chopped walnuts (1/2 cup): Nuts add crunch and a toasty flavor to balance the soft, sweet dates.
- Dates (1 cup, finely cut): Dates are the star! They add natural sweetness, chewy texture, and that rich caramel flavor date nut bread is known for. Cutting them finely helps them spread evenly through every slice instead of sinking to the bottom.
Tips for Success
- Save time with pre-chopped dates. Most grocery stores sell dates already chopped, usually in the baking aisle near the raisins. If you’re cutting whole dates yourself, kitchen scissors work so much better than a knife, and a quick dip of the blades in flour every so often keeps them from sticking.
- Toss the dates and nuts in a little flour. Before folding them in, coat them with a spoonful of the flour mixture. This simple trick helps keep them from sinking to the bottom of the loaf.
- Toast your nuts first. This step isn’t in the original recipe, but a few minutes in a dry skillet brings out so much more flavor. Just let them cool before adding them to the batter.
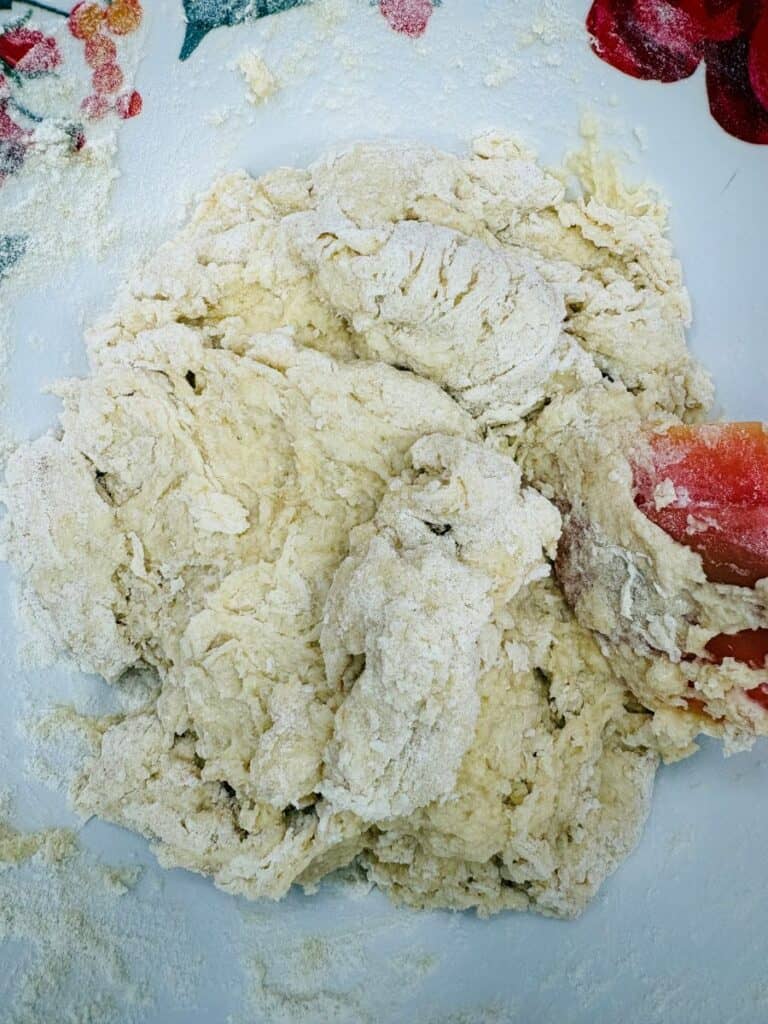
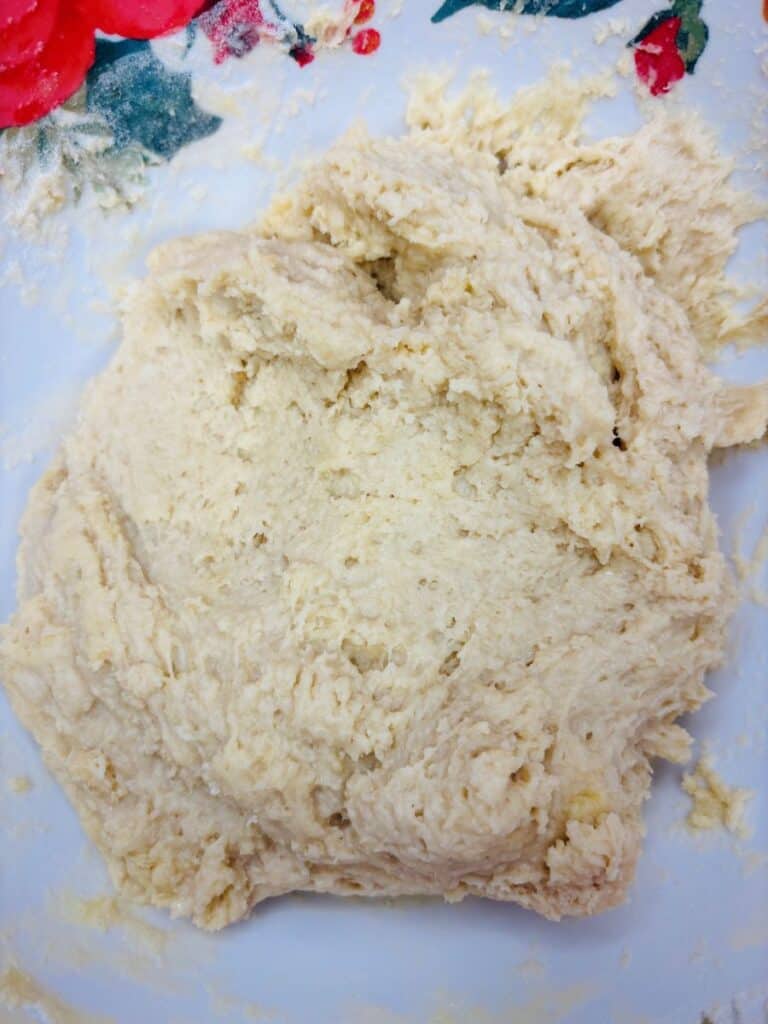
- Don’t worry about a lumpy batter. The recipe says to mix only enough to dampen the flour, and that’s the secret to a tender loaf. If you keep stirring until it’s smooth, your bread will come out tough and dense.
- Grease that pan really well. The cookbook says “greased well” for a reason, since the sugar from the dates can make the bread stick. I like to add a strip of parchment paper too so I can lift the loaf right out.
- Check for doneness with a toothpick. Ovens back in the 1950s didn’t always run the same as ours, so start checking about 10 minutes early. The bread is done when a toothpick in the center comes out clean or with just a few moist crumbs.
- Cover with foil if it browns too fast. If the top is getting dark before the center is baked, lay a piece of foil loosely over the pan for the rest of the bake time.
- Let it cool completely before slicing. I know it’s tempting, but warm quick bread tends to crumble. Even better, wrap it up and slice it the next day, because the flavor gets richer as it sits.
- Bake two small loaves for gifting. Wrapped in plastic wrap and tied with a ribbon, a loaf of date nut bread makes a sweet homemade gift for neighbors, teachers, and friends during the holidays!
Why You’ll Love Date Nut Bread
- It’s a true taste of the 1950s. This recipe comes straight from my vintage General Foods Kitchens Cookbook, so you’re baking the same date nut bread families were enjoying almost 75 years ago. It’s like taking a little trip back in time!
- It’s easy enough for beginners. There’s no yeast, no kneading, and no waiting for dough to rise. If you can stir and fold, you can make this bread.
- You probably have most of the ingredients already. Flour, sugar, milk, an egg, and a few pantry staples are all you need. Grab some dates and nuts, and you’re ready to bake.
- It’s naturally sweet without being too sugary. The dates do a lot of the work here, giving the bread a rich, caramel-like flavor. It’s sweet enough to feel like a treat but still perfect for breakfast.
- It makes the house smell amazing. Brown sugar, dates, and toasty nuts baking in the oven? It smells like the holidays in the best way.
- It’s perfect for holiday gifting. Bake two smaller loaves, and you’ve got one to keep and one to give away. It’s a thoughtful homemade gift for neighbors, teachers, and anyone on your list.
- It gets better the next day. Unlike a lot of baked goods, date nut bread tastes even richer after sitting overnight, which makes it a great make-ahead option for Christmas morning or Thanksgiving brunch.
- It pairs with just about anything. Spread it with butter or cream cheese, serve it with coffee or tea, or set it out on a holiday brunch table. It always fits right in.
Substitutions and Variations
One of the things I love about vintage recipes is how easy they are to adapt. Here are a few swaps and fun twists you can try.
Substitutions
- Shortening: Melted butter is my favorite swap and adds a richer flavor. Vegetable oil or canola oil works too, in the same amount.
- Milk: Buttermilk makes the bread a little more tender with a slight tang. Unsweetened almond or oat milk works if you need a dairy-free option.
- Sifted flour: If you don’t want to sift, spoon and level about 2 3/4 cups of all-purpose flour instead of 3 cups. Packing in a full 3 cups of unsifted flour can make the loaf dry.
- Gluten-free: A 1-to-1 gluten-free baking flour blend should work in this recipe. The texture may be a bit more crumbly, so let it cool completely before slicing.
- Brown sugar: Light or dark brown sugar both work. Dark brown sugar gives a deeper molasses flavor.
- Walnuts: Pecans are the classic choice, but you can leave them out completely if you have a nut allergy in the family. Just add a little extra dried fruit to make up the difference.
- Dates: Chopped dried figs, raisins, or dried apricots can stand in for dates. If your dates are on the dry side, soak them in hot water for 10 minutes, then drain and pat dry before adding.
Variations
- Holiday spice: Add 1 teaspoon of cinnamon and a pinch of nutmeg to the dry ingredients for a cozy Christmas flavor.
- Orange date nut bread: Stir in the zest of one orange. Orange and dates are a classic pairing, and it brightens up the whole loaf.
- Chocolate chip: Swap the nuts for mini chocolate chips. The kids will love this one!
- Cranberry date bread: Replace half the dates with dried cranberries for a pop of color that’s perfect for Thanksgiving.
- Cinnamon sugar topping: Sprinkle the top with a mix of sugar and cinnamon before baking for a sweet, crackly crust.
- Date nut muffins: Fill greased or lined muffin cups about 2/3 full and bake at 350°F for 20 to 25 minutes, until a toothpick comes out clean.
- Mini loaves: Divide the batter among mini loaf pans and bake for about 35 to 40 minutes. They’re just right for holiday gift baskets and cookie exchanges!
Storage Tips
The good news is that date nut bread keeps really well, which makes it a great bake-ahead treat for the holidays. Here’s how to keep it fresh and moist.
- Let it cool completely first. Wrapping warm bread traps steam and can make the top sticky or soggy. Give it a couple of hours on a wire rack before you store it.
- Room temperature: Wrap the loaf tightly in plastic wrap or foil, or tuck it into an airtight container. It will stay fresh on the counter for up to 3 to 4 days.
- Refrigerator: You can keep it in the fridge for up to a week, but it can dry out a little faster in there. Wrap it extra well, and let slices come to room temperature before serving for the best flavor.
- Freezer: Date nut bread freezes beautifully! Wrap the cooled loaf in plastic wrap, then a layer of foil, and freeze for up to 3 months.
- Freeze it in slices. I like to slice the loaf first and put a small piece of parchment paper between the slices before freezing. That way you can grab just one or two at a time for breakfast or a quick snack with coffee.
- Thawing: Let a whole loaf thaw overnight on the counter, still wrapped. Individual slices thaw in about 30 minutes, or you can warm them in the toaster.
- Warming it up: A slice of date nut bread lightly toasted with a pat of butter is so good. You can also pop a slice in the microwave for about 10 seconds to soften it.
- Storing for gifts: If you’re baking loaves to give away, make them a week or two ahead and freeze them. Thaw them the day before, then wrap them up with a ribbon and they’ll taste freshly baked!
Frequently Asked Questions
What is date nut bread? Date nut bread is a classic quick bread made with chopped dates, nuts, and brown sugar. It’s moist, lightly sweet, and was a favorite in American kitchens during the mid-1900s, especially around the holidays. This version comes straight from my 1950s General Foods Kitchens Cookbook.
What kind of dates should I use? Medjool and Deglet Noor dates both work well. Just make sure they’re pitted! Pre-chopped dates from the baking aisle are an easy shortcut and save a lot of sticky chopping.
Why did my dates and nuts sink to the bottom? This usually happens when the fruit and nuts are heavy compared to the batter. Toss them in a spoonful of the flour mixture before folding them in, and they’ll stay spread throughout the loaf.
Can I use butter instead of shortening? Yes! Melted butter is a great swap and adds a richer flavor. Use the same amount the recipe calls for, which is 1/4 cup.
How do I know when date nut bread is done? Insert a toothpick into the center of the loaf. If it comes out clean or with just a few moist crumbs, it’s ready. Start checking about 10 minutes before the bake time is up, since every oven runs a little differently.
Why is my date nut bread dry or dense? The two biggest culprits are too much flour and overmixing. Vintage recipes use sifted flour, which measures lighter than scooped flour, so sift before measuring or spoon it in lightly. Then stir only until the flour is dampened. A lumpy batter is exactly what you want!
Can I make date nut bread without nuts? Absolutely. Just leave them out or replace them with extra dates, raisins, or mini chocolate chips. It will still be delicious.
Should I slice it right out of the oven? I know it’s hard to wait, but let it cool completely first. Warm quick bread tends to crumble, and the flavor actually gets richer if you wrap it up and slice it the next day.
Can I freeze date nut bread? Yes, it freezes beautifully for up to 3 months. Wrap it tightly in plastic wrap and then foil. You can freeze the whole loaf or individual slices.
Can I make this recipe as muffins? You sure can! Fill greased or lined muffin cups about 2/3 full and bake at 350°F for 20 to 25 minutes, until a toothpick comes out clean.
What should I serve with date nut bread? Cream cheese is the classic topping, and butter is always a good choice too. It’s perfect with a cup of coffee or tea, and it makes a sweet addition to a Christmas morning or Thanksgiving brunch table.
What to Serve with Date Nut Bread
Date nut bread is one of those recipes that fits in just about anywhere. You can slice it up for breakfast, set it out on a holiday brunch table, or pair it with a hot drink for an afternoon snack. Here are some of my favorite ways to serve it.
The classic way to enjoy date nut bread is with a thick layer of softened cream cheese, and it’s pure nostalgia in every bite. If you want to switch things up, my Homemade Apple Butter is sweet, spiced, and so good with the caramel flavor of the dates. A spoonful of Cranberry Orange Relish adds a tart, bright contrast and brings a little Thanksgiving to the breakfast table. You can also whip up an easy honey butter with a pinch of cinnamon, or stir orange zest and powdered sugar into cream cheese for a spread that feels extra special for the holidays.
For a cozy breakfast or brunch, date nut bread pairs beautifully with savory dishes. My Shirred Eggs are a simple vintage recipe that balances out the sweetness, and Quiche Lorraine makes a lovely centerpiece for a holiday spread. If you’re feeding a crowd on Christmas morning, my Sausage Biscuits and Gravy Casserole can be made ahead, and Classic French Toast is always a hit with the kids. Thin slices of baked ham are another great option, since that sweet and salty combination is hard to beat. For even more ideas, check out my roundup of Christmas Brunch recipes.
If you’d like something on the lighter side, a Waldorf Salad is a natural fit, with crisp apples and walnuts that echo the nutty flavor of the bread. My Orange Fluff Salad adds a fun, retro touch to any vintage-inspired table. A fresh fruit salad with citrus, grapes, and pomegranate seeds keeps things bright and colorful. Back in the day, date nut bread spread with cream cheese was a popular tea sandwich, so it’s perfect next to chicken salad sandwiches for a holiday luncheon or tea party.
When it comes to drinks, you can’t go wrong with a hot cup of coffee or tea alongside a slice of date nut bread. On a snowy day, hot cocoa is a cozy pick for kids and grown-ups alike. Warm spiced apple cider with a cinnamon stick is another favorite of mine, and it makes the whole house smell like the holidays.
Date nut bread also makes a wonderful addition to holiday treat trays and gift tins. Pair it with my spiced Hermit Cookies, which are packed with raisins and nuts, or add a pop of color with my vintage Easy Cinnamon Candy. Buttery Christmas Snowball Cookies and old-fashioned Divinity Candy round out the tin perfectly. If you need even more ideas to fill those gift boxes, browse my collection of Christmas Cookies!
Other Recipes You May Enjoy
If you like Date Nut Bread, you might also like my Applesauce Bread or my No Knead Cinnamon Raisin Bread. This Snickerdoodle Bread is also delicious.
Date Nut Bread

Equipment
Ingredients
- 3 Cups Flour sifted
- 3 teaspoons Baking Powder
- ¼ teaspoon Baking Soda
- 1½ teaspoons Salt
- ½ Cup Sugar
- ¼ Cup Brown Sugar firmly packed
- 1 Egg well beaten
- 1¼ Cups Milk
- ¼ Cup Shortening
- ½ Walnuts finely chopped
- 1 Cup Dates finely cut
Instructions
- Preheat the oven to 350℉.
- Grease one 9"x5"x3 inch loaf pan or two 8"x4'x3" loaf pans and set aside.
- Measure the sifted flour and add the baking powder, baking soda, salt, and sugar. Sift again.
- Add the brown sugar and combine.
- Combine the egg and the milk.
- Add to the flour mixture, then add shortening. Mix only enough to dampen the flour.
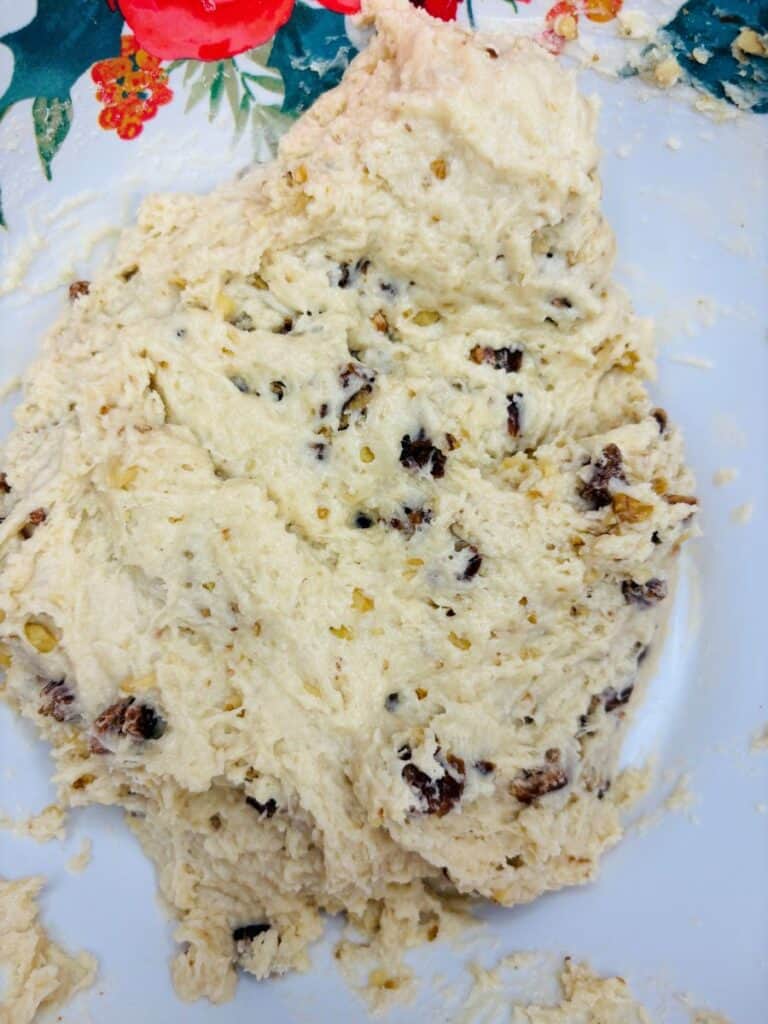
- Fold in the walnuts and dates.
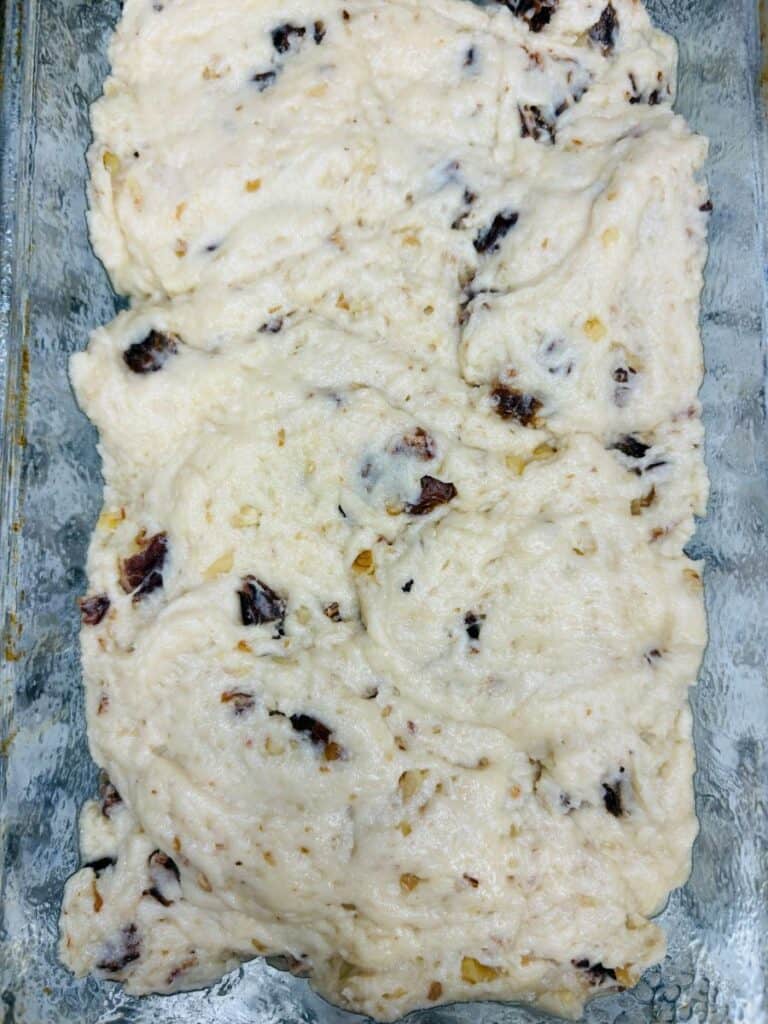
- Pour batter into the prepared loaf pan or pans.
- Bake at 350℉ for 1 hour and 5 minutes for one 9"x5"x3" pan or for 50 minutes for two 8"x4"x3" pans.
Notes
- Save time with pre-chopped dates. Most grocery stores sell dates already chopped, usually in the baking aisle near the raisins. If you’re cutting whole dates yourself, kitchen scissors work so much better than a knife, and a quick dip of the blades in flour every so often keeps them from sticking.
- Toss the dates and nuts in a little flour. Before folding them in, coat them with a spoonful of the flour mixture. This simple trick helps keep them from sinking to the bottom of the loaf.
- Toast your nuts first. This step isn’t in the original recipe, but a few minutes in a dry skillet brings out so much more flavor. Just let them cool before adding them to the batter.
- Don’t worry about a lumpy batter. The recipe says to mix only enough to dampen the flour, and that’s the secret to a tender loaf. If you keep stirring until it’s smooth, your bread will come out tough and dense.
- Grease that pan really well. The cookbook says “greased well” for a reason, since the sugar from the dates can make the bread stick. I like to add a strip of parchment paper too so I can lift the loaf right out.
- Check for doneness with a toothpick. Ovens back in the 1950s didn’t always run the same as ours, so start checking about 10 minutes early. The bread is done when a toothpick in the center comes out clean or with just a few moist crumbs.
- Cover with foil if it browns too fast. If the top is getting dark before the center is baked, lay a piece of foil loosely over the pan for the rest of the bake time.
- Let it cool completely before slicing. I know it’s tempting, but warm quick bread tends to crumble. Even better, wrap it up and slice it the next day, because the flavor gets richer as it sits.
- Bake two small loaves for gifting. Wrapped in plastic wrap and tied with a ribbon, a loaf of date nut bread makes a sweet homemade gift for neighbors, teachers, and friends during the holidays!
Amazon and the Amazon logo are trademarks of Amazon.com, Inc, or its affiliates.