
Old-Fashioned Toffee Bars Recipe (No Candy Thermometer)
Some of the links in this post are affiliate links. This means if you click on the link and purchase the item, I will receive an affiliate commission at no extra cost to you. All opinions remain my own.
As an Amazon Associate I earn from qualifying purchases.
Last Updated on September 7, 2026 by Heidi Bruaw
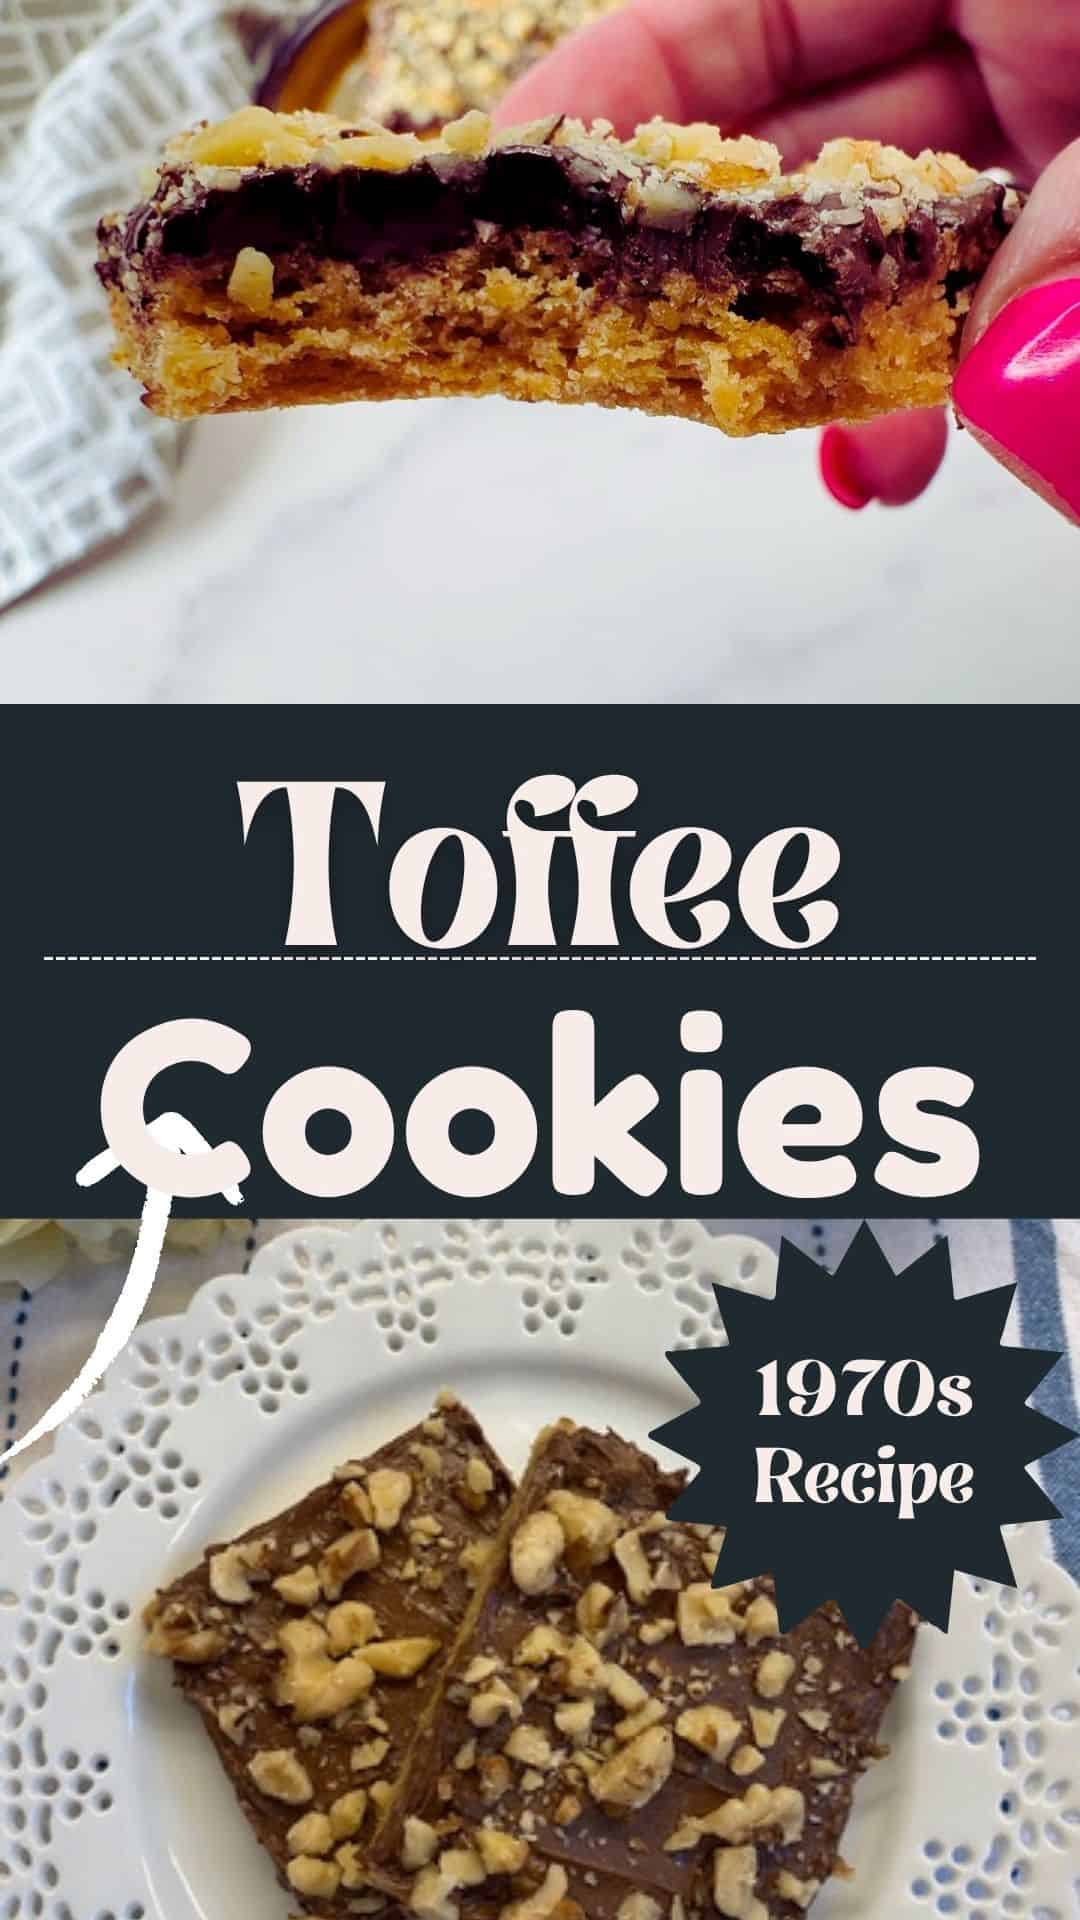
I pulled this one out of The American International Encyclopedic Cookbook by Anne London, copyright 1979. It’s one of the beat-up ones in my collection, and it’s earned it. Fair warning before you scroll: there’s no toffee candy in these, no Heath bits, no candy thermometer, just a cup of butter and a cup of brown sugar doing their thing in the oven until the whole pan tastes like toffee.
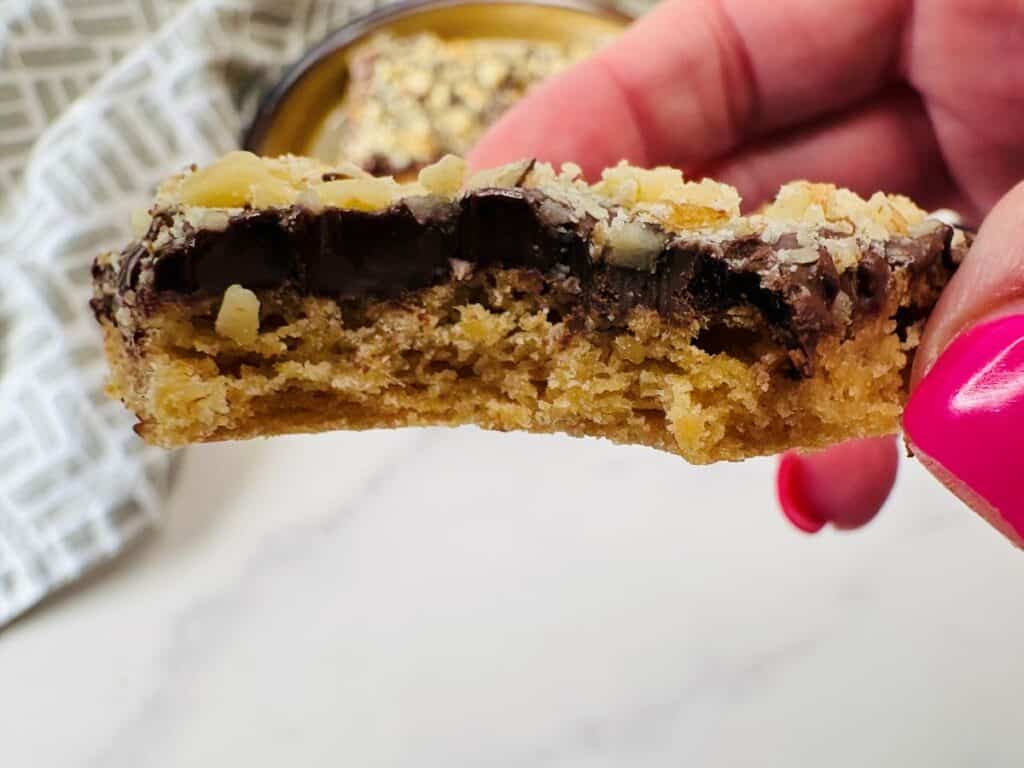
You’ll see these called toffee bars, toffee squares, or toffee cookie bars depending on whose church cookbook you’re holding. That’s not an accident. One sheet pan, two dozen people, potluck season handled. I’ve been making them since 2022, and the part I still love is that they crunch like toffee without gluing your teeth together. Press, bake, tent with foil, cut while warm. Forty minutes and your cookie tray is done.
Quick Facts
- What they are: A pressed shortbread bar with melted chocolate and walnuts on top. No toffee candy, no Heath bits, no candy thermometer.
- Where the toffee flavor comes from: One cup of butter and one cup of brown sugar caramelizing together as the base bakes.
- Total time: 40 minutes (15 prep, 20 bake, 5 to melt the chocolate)
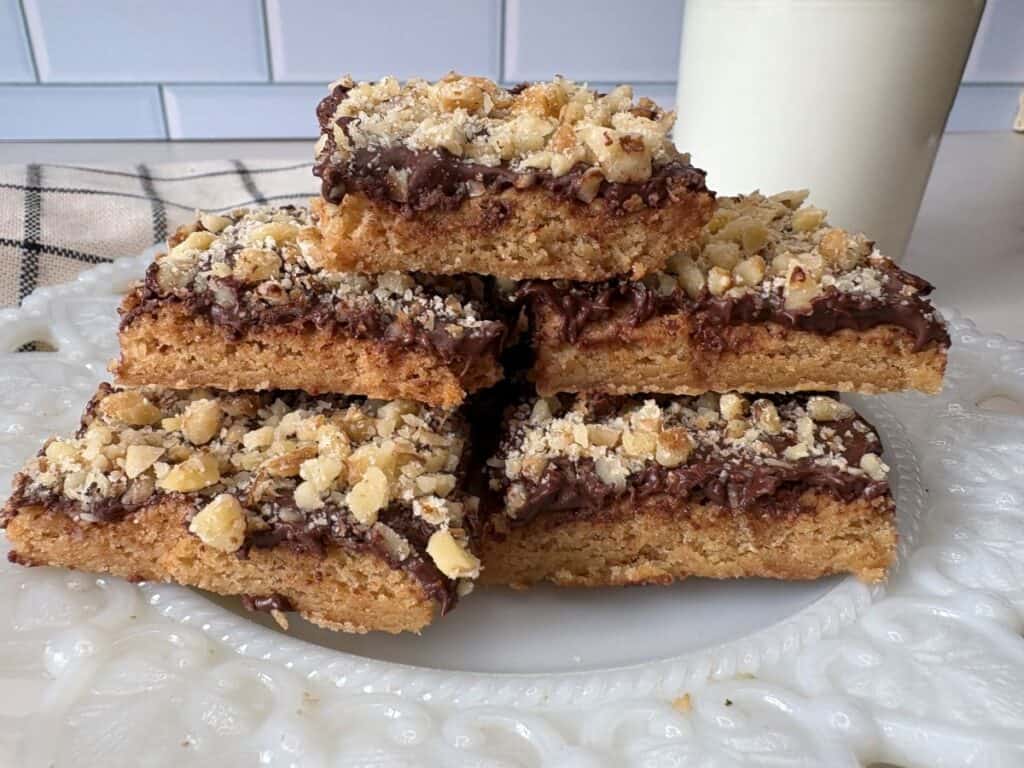
- Makes: 24 bars, cut about 4 by 3 inches
- Pan: 13×18 half sheet pan with raised sides, ungreased
- Ingredients: 7 (butter, brown sugar, egg yolk, vanilla, flour, chocolate chips, walnuts)
- Skill level: Beginner. If you can press dough into a pan with your fingers, you can make these.
- Best for: Holiday cookie trays, cookie exchanges, potlucks, and any time you need to feed a crowd from one pan.
- Recipe source: The American International Encyclopedic Cookbook by Anne London, 1979
What Each Ingredient Does
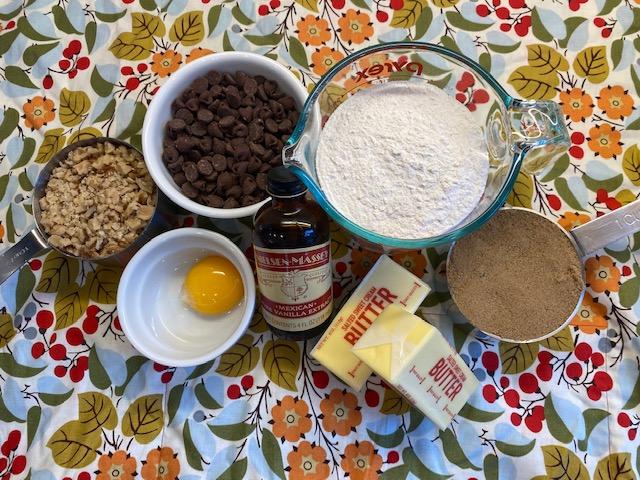
- Butter (1 cup): A full cup gives you the shortbread texture, and it’s also why you can press the dough onto an ungreased pan. The butter melts as it bakes, greasing the pan for you.
- Brown Sugar (1 cup, firmly packed): Brown sugar is where the toffee flavor is. The molasses in it caramelizes with the butter as the base bakes, and that reaction is what makes real toffee taste like toffee.
- Egg Yolk (1, beaten): Yolk only, no white. The white would add water and protein, making these cakey, and you want them dense and crisp. The yolk brings fat and just enough binding to hold the dough together.
- Vanilla (1 teaspoon): Rounds out the butter and brown sugar so the base doesn’t taste flat. In a recipe with this few ingredients, vanilla is carrying more than you’d think.
- Flour (2 cups, sifted): All-purpose flour gives the bars their structure. Sifting matters more here than in most recipes because there’s no baking soda or baking powder in this dough, so nothing will work out the lumps for you.
- Milk Chocolate Chips (12 ounces): These go on top after baking, not into the dough. The hot bars melt them from underneath, which is why you tent with foil instead of putting the pan back in the oven.
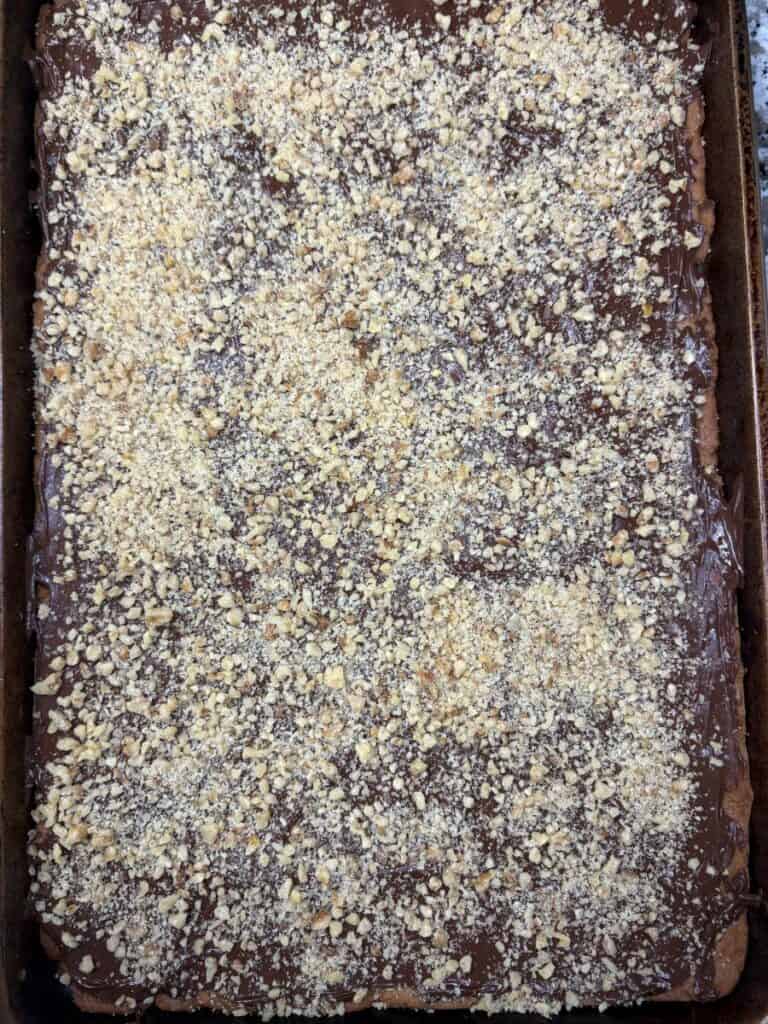
- Walnuts (1 cup, chopped): Sprinkled over the warm chocolate so they set into it as it firms up. They add crunch and cut the sweetness of the milk chocolate.
Helpful Tips for Making Toffee Cookies
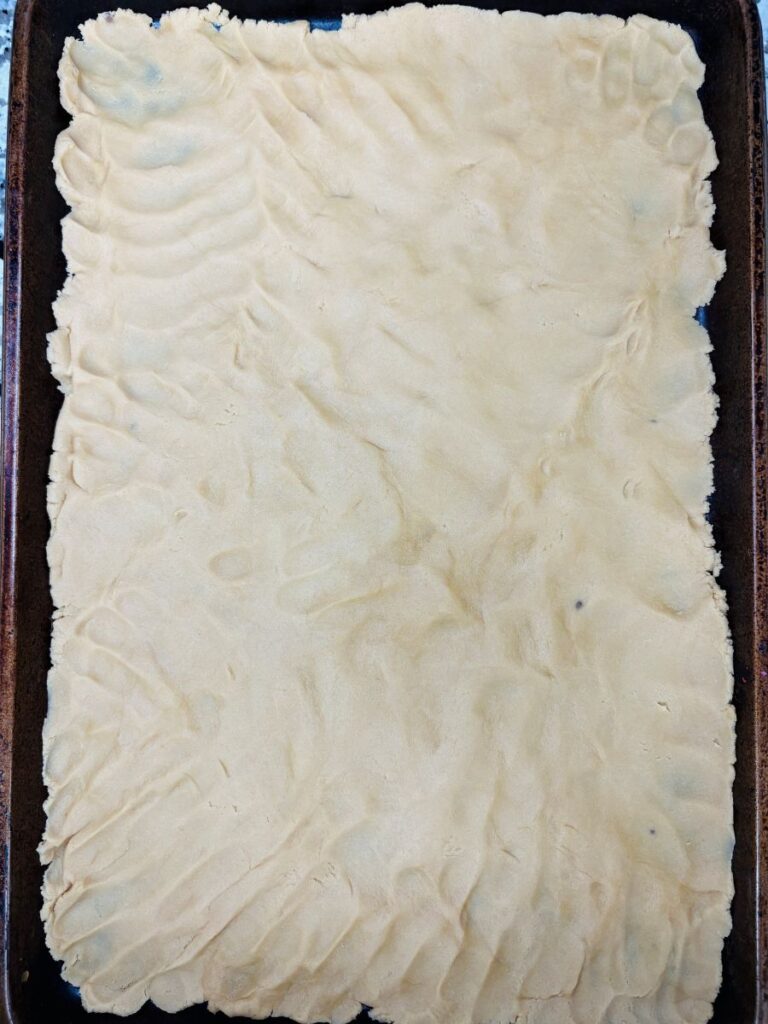
- Press the dough all the way to the edges. Use your fingers and work it out to every corner of the pan. Any gaps, and the butter runs into them, leaving greasy spots and uneven edges.
- Use a pan with raised sides. A rimless cookie sheet will let a cup of melted butter run onto your oven floor. A 13×18 half sheet pan with a lip is what you want.
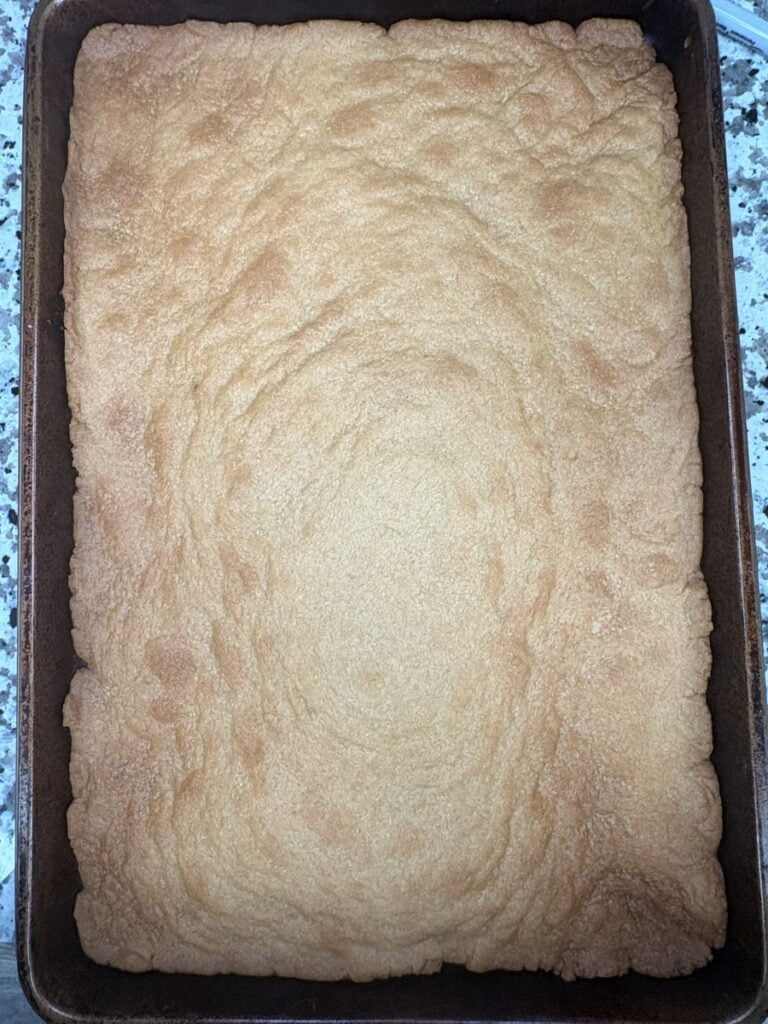
- Pull them at a slightly golden color, not brown. The edges should be light golden, and the center should look set and dry, not wet. They keep firming up on the hot pan after they come out, so browned in the oven means hard once cooled.
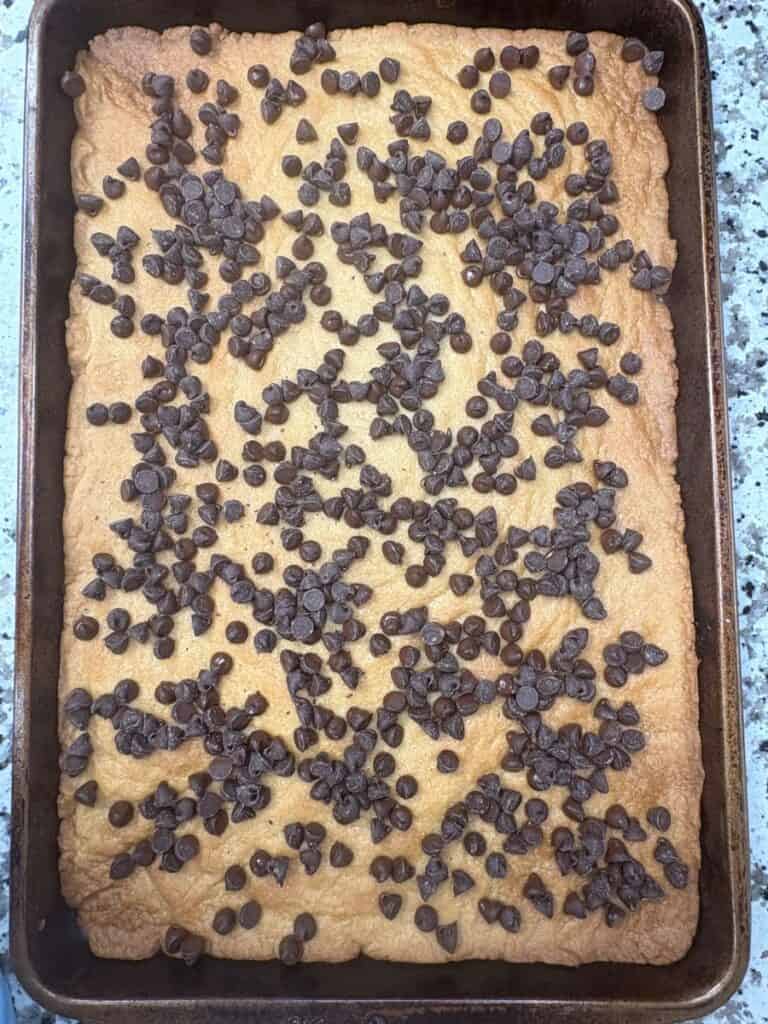
- Tent with foil to melt the chocolate faster. Sprinkle the chips over the hot bars, then lay foil over the pan in a tent about an inch high. Wait 5 minutes, and the chips will spread with almost no effort. No foil means about twice the wait and a lot more dragging.
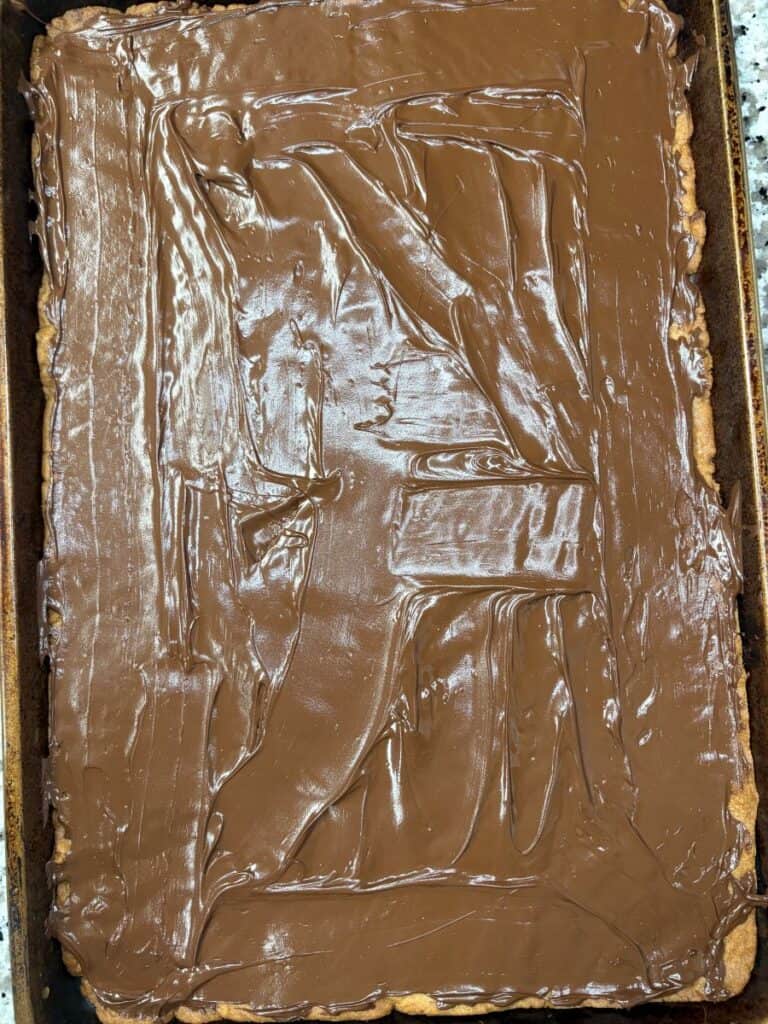
- Spread the chocolate with an offset spatula. Start in the middle and work out. A butter knife works too; just go slow so you’re not pulling up the shortbread underneath.
- Sprinkle the walnuts while the chocolate is still soft. They need to set into it. Wait too long, and they’ll slide right off when you cut.
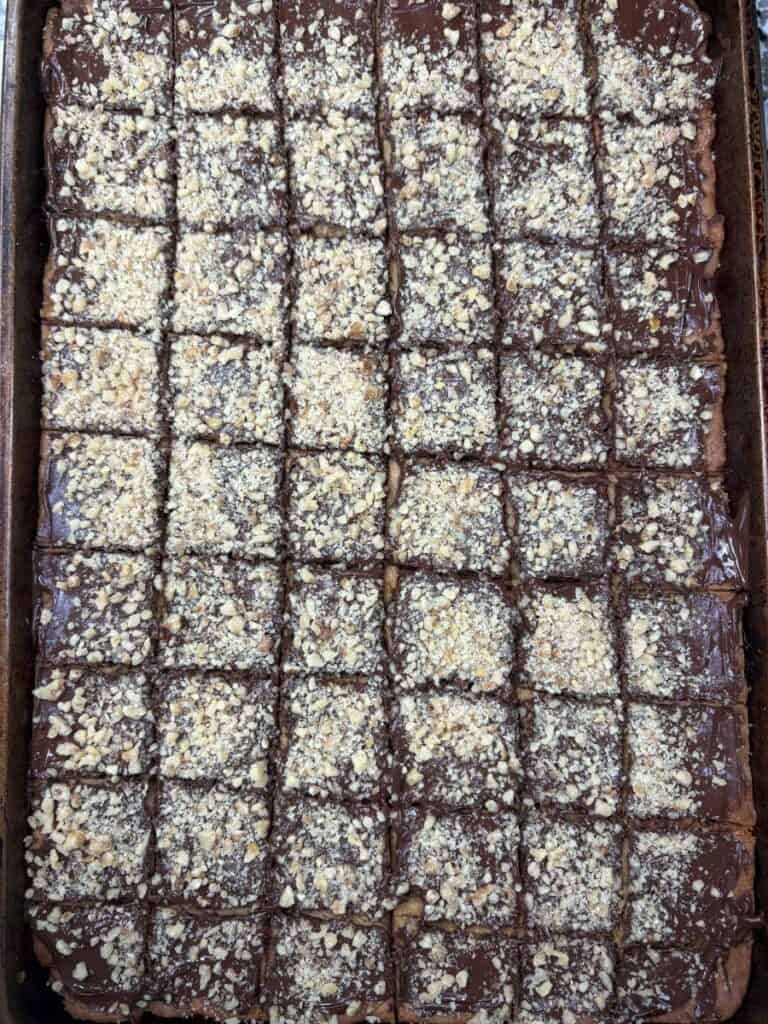
- Cut while still warm. This is the one tip you can’t skip. Cooled toffee bars shatter and crumble when you try to cut them. Warm bars cut clean.
- Use a sharp knife and wipe it between cuts. The chocolate will be soft, which is fine. A clean blade after every few cuts keeps your lines sharp rather than smeared.
- No flour sifter? Use a whisk. Run a wire whisk through the flour in the bowl for about 30 seconds. There’s no leavening in this dough to break up lumps, so don’t skip it entirely.
- Let them cool completely before storing. Warm bars in a container mean condensation, and condensation means soft, sad chocolate.
Why You’ll Love Toffee Bars
- They won’t stick to your teeth. This is the reason people keep coming back to this recipe. You get the crunch and the caramelized flavor of toffee without the jaw workout or the dental panic. Readers have been telling me this in the comments since 2022.
- Seven ingredients, all of them already in your kitchen. Butter, brown sugar, an egg, vanilla, flour, chocolate chips, walnuts. No toffee bits, no candy thermometer, no special trip to the store.
- One pan feeds two dozen people. You press the dough into a single sheet pan and cut it into 24 bars. Compare that to scooping and rotating three batches of drop cookies.
- Forty minutes start to finish. Fifteen minutes of hands-on work, twenty in the oven, five to melt the chocolate. Faster than most cookies, because there’s no chilling and no scooping.
- No mixer required. You can cream a cup of soft butter with a wooden spoon and some patience. Nothing here needs a stand mixer.
- They travel well. Cut bars stacked in a container with parchment between the layers hold up to a car ride. That makes them a good pick for a cookie exchange, a potluck, or a tray you’re handing off at the door.
- They’re a 1979 recipe that still works. This one comes from The American International Encyclopedic Cookbook by Anne London.
Substitutes and Variations
- Pecans instead of walnuts. A one-for-one swap. Pecans are a little sweeter and softer, which some people prefer with milk chocolate.
- Semi-sweet or dark chocolate chips instead of milk chocolate. Use the same 11 ounces. Milk chocolate makes these sweet, so dark is the move if you want the brown sugar to come through more.
- Salted butter instead of unsalted. Works fine. There’s no salt in the recipe as written, so salted butter adds a little contrast to the sweetness.
- Skip the nuts entirely. The bars hold together without them. Do this for a school party or anywhere a nut allergy is in play, and press the chocolate flat with an offset spatula so the top still looks finished.
- Toffee bits on top. Sprinkle Heath Bits O’ Brickle over the melted chocolate alongside or instead of the nuts. This is the version people expect when they search for toffee cookies, so it’s an easy crowd-pleaser.
- Flaky sea salt. A light sprinkle over the warm chocolate. Salt and caramelized brown sugar are a classic pairing, and it takes ten seconds.
- Peanut butter chips. Swap half the chocolate chips for peanut butter chips and swirl the two together as they melt.
- Holiday sprinkles. Scatter them over the soft chocolate so they set in. Easy way to make the same recipe work for a Christmas tray, Valentine’s, or a birthday.
- Crushed candy canes. Crush them fine and sprinkle over the warm chocolate. Peppermint and milk chocolate is the December version of this recipe.
- Toasted coconut. Sprinkle over the melted chocolate in place of the nuts for a different crunch.
- Toasted nuts. Whether you use walnuts or pecans, toasting them for 5 to 7 minutes at 350 before chopping makes a noticeable difference.
Storage Tips
- Room temperature: Store toffee bars in an airtight container at room temperature for up to 1 week. Put parchment or wax paper between the layers if you’re stacking them so the chocolate doesn’t transfer. Tucking a slice of bread in the container helps keep moisture out.
- Let them cool completely first. Warm bars in a sealed container create condensation, and condensation gives you soft, streaky chocolate. Give them at least an hour on the counter after cutting.
- Freezer: Toffee bars freeze well for up to 3 months. Cool completely, layer them with parchment in a freezer-safe container, and seal it tight. Thaw at room temperature for about an hour before serving.
- Skip the refrigerator. The fridge dries out the shortbread base and can leave a dull, chalky bloom on the chocolate. Room temperature or the freezer is the way to go.
- Make-ahead: Bake and cut them up to 3 days before an event, then store at room temperature. If you need more lead time than that, freeze them instead of stretching the counter storage.
- Traveling with them: Stack cut bars flat in a hard-sided container with parchment between layers. Keep them out of a hot car, since the chocolate topping will soften.
Frequently Asked Questions
What’s the difference between toffee bars and toffee cookies? Toffee bars are pressed into a sheet pan and cut into squares. Toffee cookies are usually drop cookies with toffee bits mixed into the dough. This recipe is a bar and contains no toffee at all. The toffee flavor comes from butter and brown sugar caramelizing as the base bakes.
Do these have toffee in them? No. There are no Heath bits, no toffee candy, and no candy thermometer involved. The flavor comes entirely from a cup of butter and a cup of brown sugar baking together into a shortbread base.
How do I keep toffee bars from sticking to the pan? This recipe has a full cup of butter, so the butter melts as it bakes and greases the pan for you. No greasing needed. Just cut them while they’re still warm. If you’d rather use parchment paper, it works fine.
Do I have to cut them while they’re warm? Yes, this is the one step you can’t skip. Cooled toffee bars crack and crumble when you cut them. Warm bars cut clean and then firm up as they finish cooling.
Does the chocolate smear if I cut them warm? The chocolate will be soft, but it’s not a mess. Use a sharp knife and wipe the blade every few cuts, and your lines will stay sharp.
Can I use a 9×13 pan instead of a half sheet pan? Yes, though the bars will come out noticeably thicker. Add about 5 to 10 minutes to the bake time and pull them when the edges are set and dry. You’ll get fewer, chunkier bars.
Why only the egg yolk and not the whole egg? The egg white adds water and protein, which would make these cakey and puffy. You want dense and crisp. The yolk gives you fat and just enough binding to hold the dough together.
How long do toffee bars last? Up to 1 week in an airtight container at room temperature, or up to 3 months in the freezer. Layer them with parchment paper either way.
How many bars does this make? 24 bars from a 13×18 half sheet pan.
Can I make these ahead for a cookie exchange? Yes. Bake and cut them up to 3 days ahead and store at room temperature, or freeze up to 3 months and thaw on the counter for about an hour before serving.
What to Serve with Toffee Bars
- On a holiday cookie tray. Toffee bars are a bar cookie, so they give a tray height and contrast next to round cookies. Pair them with Christmas Snowball Cookies, Almond Crescent Cookies, and Gingersnaps for a mix of textures. Spritz cookies and pizzelles are good additions too, since a tray reads better when the shapes and colors vary. If you want more ideas, my Christmas Cookies roundup has the full lineup.
- With other bars and candy. 7 Layer Bars, Old-Fashioned Fudge Nut Bars, and Peppermint Sugar Cookie Bars all cut into squares, so they plate together neatly. Saltine Toffee, Peanut Brittle, and Divinity Candy round out a candy-and-bar tray. Chocolate-dipped pretzel rods and salted caramels work well here for the same reason.
- With something to drink. Coffee is the classic pairing, and one of my readers said these are divine with a cup. Cold milk works just as well for kids. Espresso, a cappuccino, or a mug of chai all hold up against the sweetness. For a party, a Sherbet Punch or hot cocoa both cut the richness. Mulled cider is a good December option.
- As a dessert plate. Serve a warm bar with a scoop of vanilla or No-Churn Custard Ice Cream. Coffee ice cream is worth trying if you want the flavors to play off each other. A drizzle of caramel sauce, a spoonful of whipped cream, or a handful of fresh raspberries turns two bars into a real dessert.
- At a potluck or game day spread. These travel well and don’t need a fork, which makes them easy on a crowded table. Set them next to a fruit tray, a bowl of mixed nuts, or a cheese board so there’s something not sweet on the table. See my Potluck Dishes and Game Day Appetizers roundups for what to bring alongside.
- In a gift tin. Layer them with parchment between rows, and tuck in Fudge or Traditional Rum Balls to fill out the tin. Chocolate-covered almonds and homemade caramel corn also travel well in a tin.
Other Recipes You Might Like
You may also enjoy my Corn Flake Cookies or my Chocolate Shortbread Cookies. Sheet Pan Chocolate Chip Cookies and Nut Goodie Bars are also delicious options. These White Chocolate Chip Cookies are tasty too.

Toffee Bars aka Toffee Bars

Equipment
Ingredients
Instructions
- Preheat oven to 350°.
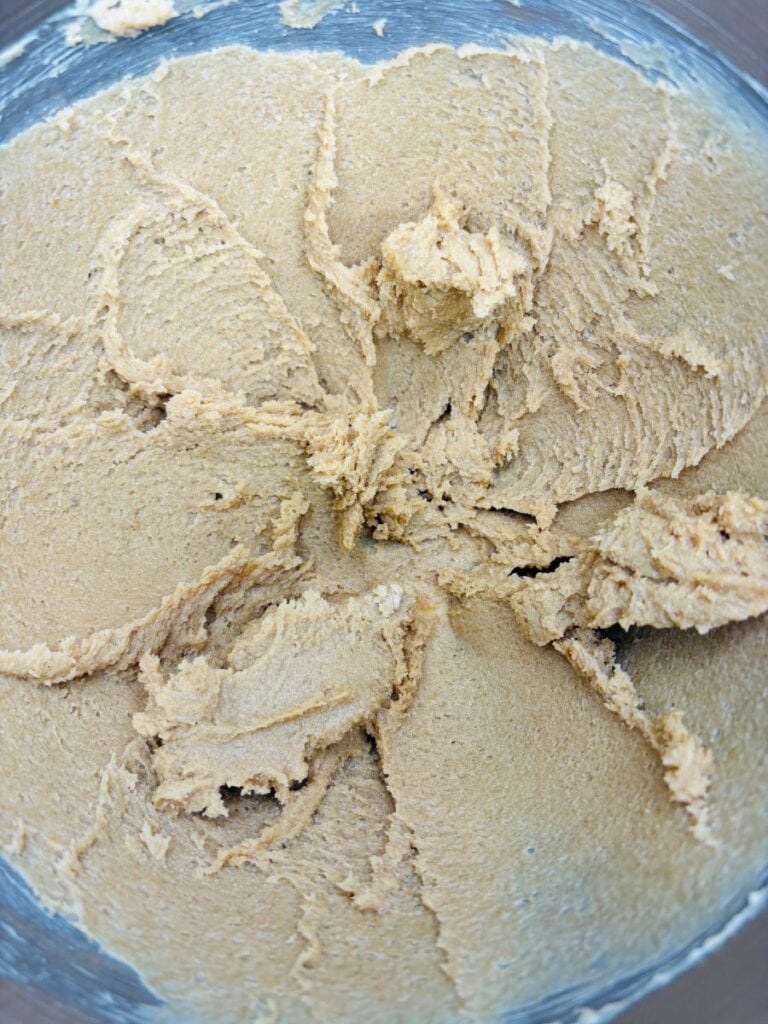
- Cream butter.
- Add brown sugar and cream until well blended.
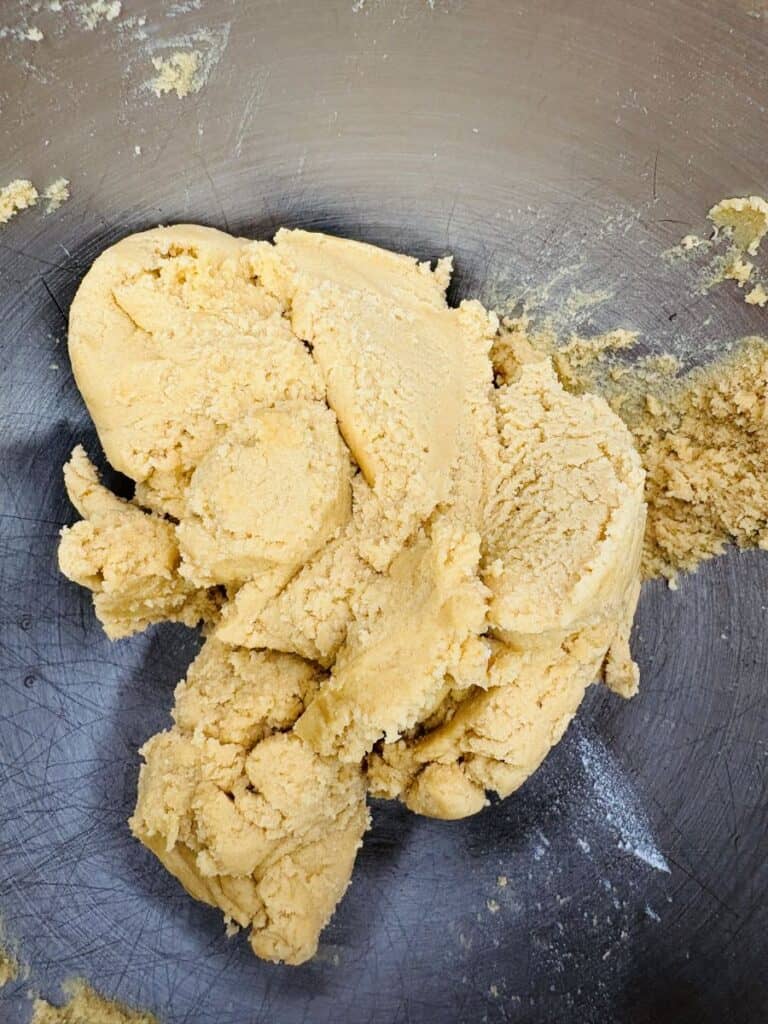
- Add beaten egg yolk, vanilla, and sifted flour and mix well.
- Press onto ungreased 13"x18" cookie sheet (with edges) with your fingers. It should go to the edge.
- Bake at 350° for 15-20 minutes or until slightly golden brown.
- Upon removing from the oven, sprinkle milk chocolate chips on top. To keep heat in, cover with aluminum foil. Let them melt for about 5 minutes and then spread evenly across top.
- Sprinkle with walnuts.
- Cut into squares while cookies are warm.
Notes
- Press the dough all the way to the edges. Use your fingers and work it out to every corner of the pan. Any gaps, and the butter runs into them, leaving greasy spots and uneven edges.
- Use a pan with raised sides. A rimless cookie sheet will let a cup of melted butter run onto your oven floor. A 13×18 half sheet pan with a lip is what you want.
- Pull them at a slightly golden color, not brown. The edges should be light golden, and the center should look set and dry, not wet. They keep firming up on the hot pan after they come out, so browned in the oven means hard once cooled.
- Tent with foil to melt the chocolate faster. Sprinkle the chips over the hot bars, then lay foil over the pan in a tent about an inch high. Wait 5 minutes, and the chips will spread with almost no effort. No foil means about twice the wait and a lot more dragging.
- Spread the chocolate with an offset spatula. Start in the middle and work out. A butter knife works too; just go slow so you’re not pulling up the shortbread underneath.
- Sprinkle the walnuts while the chocolate is still soft. They need to set into it. Wait too long, and they’ll slide right off when you cut.
- Cut while still warm. This is the one tip you can’t skip. Cooled toffee bars shatter and crumble when you try to cut them. Warm bars cut clean.
- Use a sharp knife and wipe it between cuts. The chocolate will be soft, which is fine. A clean blade after every few cuts keeps your lines sharp rather than smeared.
- No flour sifter? Use a whisk. Run a wire whisk through the flour in the bowl for about 30 seconds. There’s no leavening in this dough to break up lumps, so don’t skip it entirely.
- Let them cool completely before storing. Warm bars in a container mean condensation, and condensation means soft, sad chocolate.
Adapted from The American International Encyclopedic Cookbook by Anne London, Copyright 1979
Amazon and the Amazon logo are trademarks of Amazon.com, Inc, or its affiliates.



I like that these were softer than toffee. I don’t typically eat toffee because I find it difficult to eat but I like that these are softer. They sound lovely!
Thank you so much, Jenny! I have that problem with regular toffee too! 🙂
These look so good! It’s great that they don’t get stuck in your teeth, always annoying when you eat toffee x
Thank you! Yes, that is so annoying! That’s why these are great. 🙂
Ooh these look so delicious! I can never say no to a cookie so I’ll definitely be making these. The tent tip is really handy! Thank you so much for sharing x
Thank you! My friend taught me that tip so I thought I would pass it along! It sure made melting the chocolate chips easier. 🙂
These look so delicious and yummy! I love toffee and chocolate and these bars blend the best of both worlds into a chewy snack. 🙂
Thank you! Yes, it’s great that they are a cookie with a toffee flavor. Toffee is so delicious! 🙂
Those look incredible! I don’t often make time to enjoy baking but after coming across a few fun recipes shared by bloggers, including this one, that is going to have to change. I know that my husband LOVES toffee, so I’m going to have to make these for him.
Thank you! You will have to make some time to bake, it sounds like! If your husband loves toffee, he will definitely enjoy this! 🙂
These sound delicious – good tip about the “tent” too! Bookmarking this to try when temperatures have cooled a little and I can bear to turn our oven on again 🙂
Thank you! I don’t blame you for waiting. It is quite hot right now! 🙂
These sound and look absolutely delicious! I really like toffee but don’t get to eat it so often, but really have to try and make some and also make them back home, my dad would love them! x
Thank you! If your dad likes toffee, he will enjoy these, for sure! 🙂
Yum! These toffee cookies look incredible. I love toffee so I will defintely have to try these out sometime!
Thank you so much! I hope you get to try them! 🙂
These sound and look so good. I love toffee!
Corinne x
Thank you! 🙂
Stop this second!!!!! Oh my bloody days this looks and sounds absolutely delicious! I’m a huge fan of anything toffee so I’ll for sure be gathering the ingredients and making asap. Thank you so much for sharing such a delicious recipe with us lovely, I can’t wait to get making! Xo
Elle – ellegracedeveson.com
Thank you! If you love toffee, then you will definitely enjoy these! 🙂
Oh yum!! it has been a hot minute since I’ve had a toffee cookie. I love that it takes a few ingredients to make. You can definitely make a lot with just a sheet! Thanks for sharing this recipe!!
Nancy ✨ Cold Brew Vibes
You’re welcome! It is amazing what you can make on one cookie sheet, that’s for sure! 🙂
These toffee cookies look delicious! I’ll have to try making them one day!
Thank you so much! 🙂
Heidi these look so yummy, I need to make them ASAP! I am not a big fan of toffee, but I am sure these will be too good to pass on!
Thank you! They are so delicious. 🙂
Oh wow this look so GOOD!!! And yes not hard to make. I think I may have to try this at holiday time!
Allie of
http://www.allienyc.com
Thank you! It would be great at the holidays, for sure. 🙂
These sound delicious and I can’t wait to give them a try! I love toffee so this is definitely a great match for me 🙂
Thank you! If you love toffee, you will definitely enjoy these. 🙂
I think these might be my husbands new favorite cookie. Made these last weekend and they were amazing.
I’m so glad your husband enjoyed them!
Tried this at our family gathering, and I’m glad they loved it! Toffee cookies are now one of my go-to treats recipe.
That is so great to hear!
These are delish! I was worried they’d be too sweet but they were just right and are divine with a cup of coffee!
I’m glad you liked them!
You had me at toffee! So delicious to put it in a cookie. I will definitely be adding these to my Christmas cookie lineup.
These would be great on a holiday plate!
I can never say no to a cookie and I’m pretty sure I needed about four of these to satisfy my cravings after seeing them online. They’re AMAZING.
I’m so happy you liked them!
These were amazing! I brought these to a party and everyone devoured them! I love that they’re crunchy yet don’t stick to teeth. These are going on my cookie tray around the holidays.
That is so great to hear! 🙂
Nice Post. Thanks for sharing this wonderful article.
Thank you for the compliment.
I Haven’t made these yet but know just by looking at the ingredients they will be wonderful. What I wanted to know Heidi is how do I store them once they are baked. Do they keep better in a tin in the refrigerator or can I leave them out in a tin and if so for how long.
Thanks,
Lynn
Hi Lynn,
Thank you for asking. They keep best at room temperature in an airtight container for up to 1 week. Place parchment paper or wax paper between layers if stacking. A piece of bread will help keep moisture out. If storing for longer, they can be frozen for up to three months in a freezer-safe container. I hope that helps! Let me know how they turn out. 🙂
Best,
Heidi (aka Lulu)
One of my favorite things my mom used to make when I was younger…they are so good
How fun! Yes, they are quite yummy! 🙂
How do you prevent the cookies from sticking to the sheet pan?
Hi Hannah,
Great question! This recipe has a full cup of butter, so as it bakes, the butter melts and naturally greases the pan. Just be sure to cut them while they’re still warm. If you prefer, parchment paper works great too. 😊
Best,
Heidi (aka Lulu)
Thank you! So helpful. If you cut them while they’re still warm – does the chocolate get smudged/ messy? Do they cookie break easily?
Hi Hannah,
The chocolate will be soft, but it’s not a mess; just use a sharp knife. The bars hold together fine when warm and firm up as they cool. 🙂
Best,
Heidi (aka Lulu)